
 1778
1778
Overview
This guide walks you through how to process a pending payment for a client in Hapana Core. Processing a pending payment ensures the client’s account stays up to date and that their membership remains active without interruptions.
Prerequisites
- Admin or staff access to Hapana Core.
- The client must already exist in the system with a pending payment status.
Step 1: Log in to Hapana Core
- Go to core.hapana.com/login.
- Enter your login credentials.
Step 2: Click Clients
- From the top navigation menu, click Clients.
Tip: If you don’t see the Clients tab, ensure your user role has the correct permissions.
Step 3: Search for the Client
- Use the search bar to find the client by entering their name, email address, or phone number.
Step 4: Select the Client's Name
- Locate the client in the search results.
- Click on the Client's Name to open their profile.

Step 5: Navigate to Memberships Tab
- Inside the client’s profile, access the Payments tab
- Then click the Memberships tab.

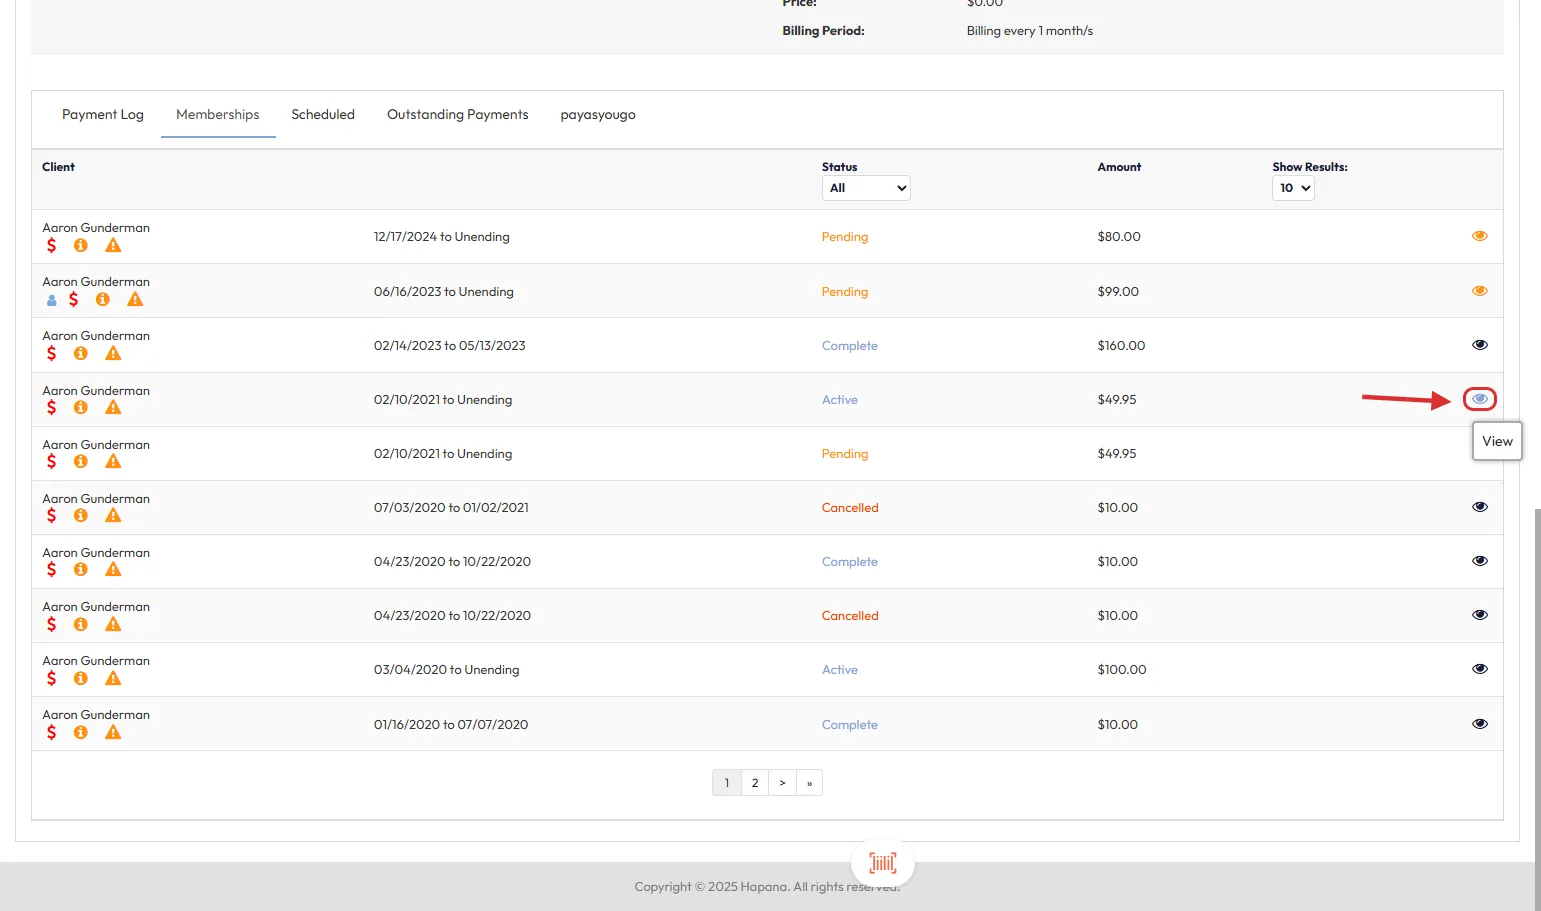
Step 6: View the Desired Membership
- Find the membership associated with the pending payment.
- Click the eye icon to the right of the membership.
Step 7: Go to the Payment Schedule
- In the membership view, scroll to the Payment Schedule section.
- Locate the pending payment and click the Card icon next to it.

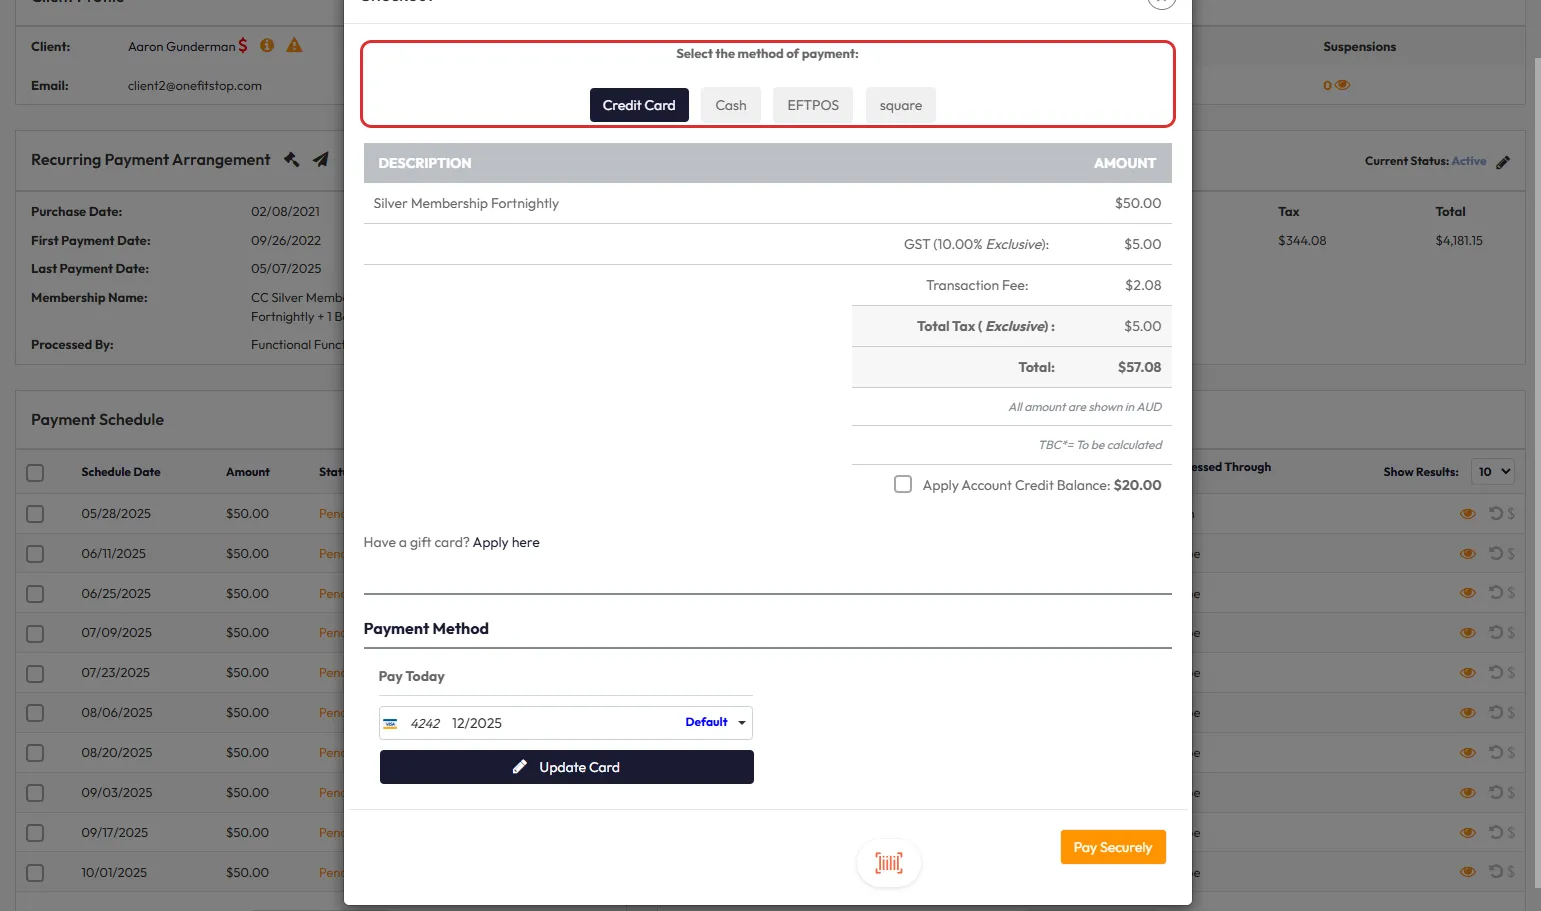
Step 8: Select a Method of Payment
- Choose a payment method:
- Card/Bank
- Account Credit
- Cash
- EFTPOS
- Terminal

Tip: The available methods depend on the client’s saved details and your location settings.
Step 9: Click Pay Securely
- After selecting the payment method, click Pay Securely to process the payment.

Step 10: Confirm Success Message
- A green success message will appear once the payment has been processed.
Step 11: Check the Payment History
- The newly paid invoice will now appear in the Payment Log section of the client’s profile.

Expected Outcome
- The pending payment will be successfully processed and recorded.
- The client's account balance and membership status will reflect the updated payment.
Frequently Asked Questions (FAQs)
Q: What happens if I select the wrong payment method?
A: You can cancel the transaction before clicking Pay Securely and start the process again.
Q: Can I process multiple pending payments at once?
A: No, payments must be processed individually.
Q: Will the client be notified after a pending payment is processed?
A: Notification settings depend on your site’s communication preferences.
Need help? Reach out to our support team at [email protected]!

