 812
812
This guide walks you through all available ways to check clients into a session using the Hapana Core platform. Whether you're managing check-ins manually or using automation through barcode or kiosk, these methods ensure client attendance is properly logged and visible in reports.
Overview
Checking clients into their sessions is an important part of maintaining accurate records, confirming attendance, and ensuring session credits are properly applied. This article covers:
- Manual check-ins via the Schedule tab or Client File
- Automated check-ins using Barcode Scanning
- Client-initiated check-ins via the Kiosk
Prerequisites
- Active sessions already created in Core
- Client booked into the session
- Barcode set up in the Client profile (for barcode check-in)
- Kiosk and barcode integrations enabled under Account Settings > Integrations
Tip: For regular high-traffic locations, we recommend using the Kiosk or Barcode Scanning for quicker front desk check-ins.
Manual Check-In from the Schedule
- Go to the Schedule tab on the home dashboard
- Click the class the client is booked into

- Find the client's name in the session list
- Click the attendance checkbox next to their name to mark as attended

Manual Check-In from the Client File (for past sessions)
- Go to the Clients tab
- Search for the desired client
- Click the calendar icon on the far right of their row

- Use the drop-down to select "Passed Sessions"

- Click on the desired session’s Attendance status to edit it

- On the popup, select Attended on the Select Attendance Type dropdown

- Click Save

Tip: This option is ideal for staff needing to backdate attendance for missed check-ins.
Barcode Check-In (Automated)
1. Assign a Barcode ID
Go to the client's profile > Client Information tab and add a unique barcode number.
2. Open Barcode Check-In Page
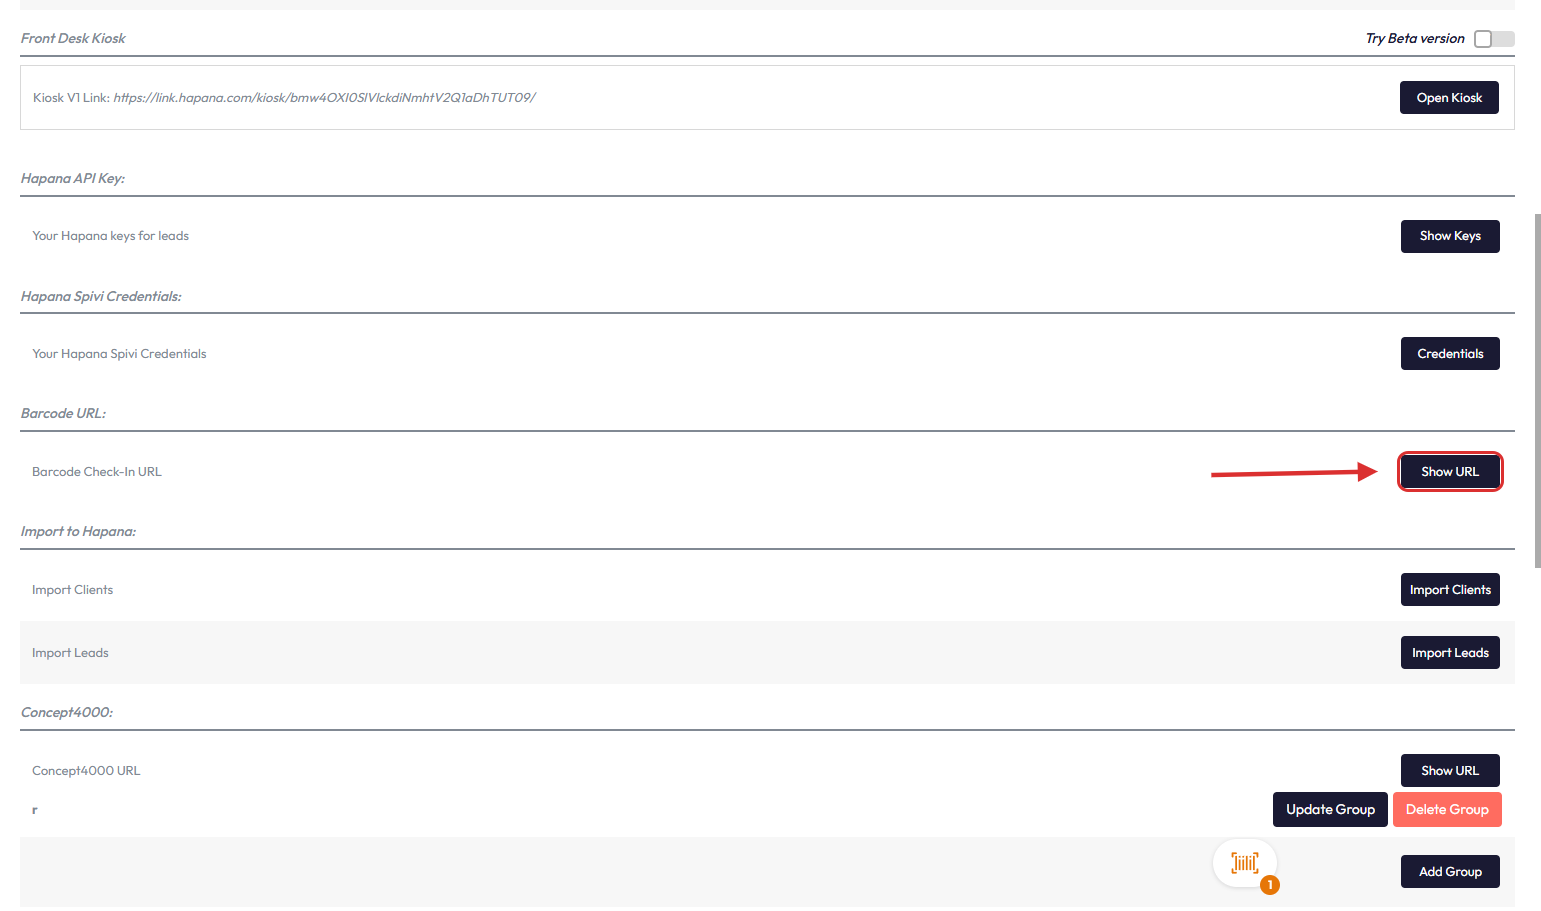
- Go to Initials (top right) > Account Settings > Integrations

- Click "Show URL" next to Barcode Check-In

- Copy and paste this into a new browser window or click Open in new window

3. Connect a Barcode Scanner
- Plug in the scanner to your check-in station
- Scan the barcode (or paste the Barcode ID manually)
Tip: Keep the tab open at all times. A separate computer just for scanning works best.

What You'll See:
- ✅ Valid scan: Green confirmation + check-in success
- ❌ Invalid scan: Red warning with an error message
- ❌ Duplicate scan (within 5 minutes): Red warning – already checked in
Tip: Check-in activity will display under Reports > Check-In as "General Check-In."
Kiosk Check-In (Client Initiated)
1. Access the Kiosk Link
- Go to Initials (top right) > Account Settings
- Click Integrations tab

- Scroll to Front Desk Kiosk
- Copy the kiosk URL and paste into a browser tab or click Open Kiosk

Tip: To avoid logging out of your admin account, right-click the link and choose "Open in Private Window".
2. How the Client Checks In
- The client types their name into the search field
- The kiosk will auto-populate their details
- Client clicks the Check-In button
If General Check-In is enabled, an additional button will appear for facility access (not session-specific).
Tip: Kiosk will log you out of your admin session for security. Always use a separate browser window or device for kiosk access.
Expected Outcome
Once checked in using any of the above methods, the client’s attendance is marked in the system and reflected in reports and dashboards. This ensures accurate tracking of sessions and credit usage.
FAQs
Can a client be checked into more than one session?
Yes, if booked and checked in properly—each session is tracked independently.
What happens if a client doesn’t check in?
They’ll be marked as a no-show unless manually updated.
Can I use barcode and kiosk check-ins at the same time?
Yes, both systems can operate in parallel to accommodate different check-in preferences.
Need help? Reach out to our support team at [email protected]


