
 693
693
Overview
The Leads tab in CORE helps you manage people who have shown interest but aren’t clients yet. You can manually add leads, assign them to team members, track notes, and convert them to full clients once they sign up.
🎥 Watch the walkthrough:
Or preview it below:
Prerequisites
Before you begin:
- Make sure you have access to the Clients and Leads tab in CORE
- Know the lead’s contact details and preferred lead source
- Have team members available to assign leads to (if needed)
Step-by-step instructions
Step 1: Access the Leads tab
- Click on the Clients tab in the top navigation
- Navigate to the Leads tab across the top of the screen
- You’ll now see a list of all existing leads


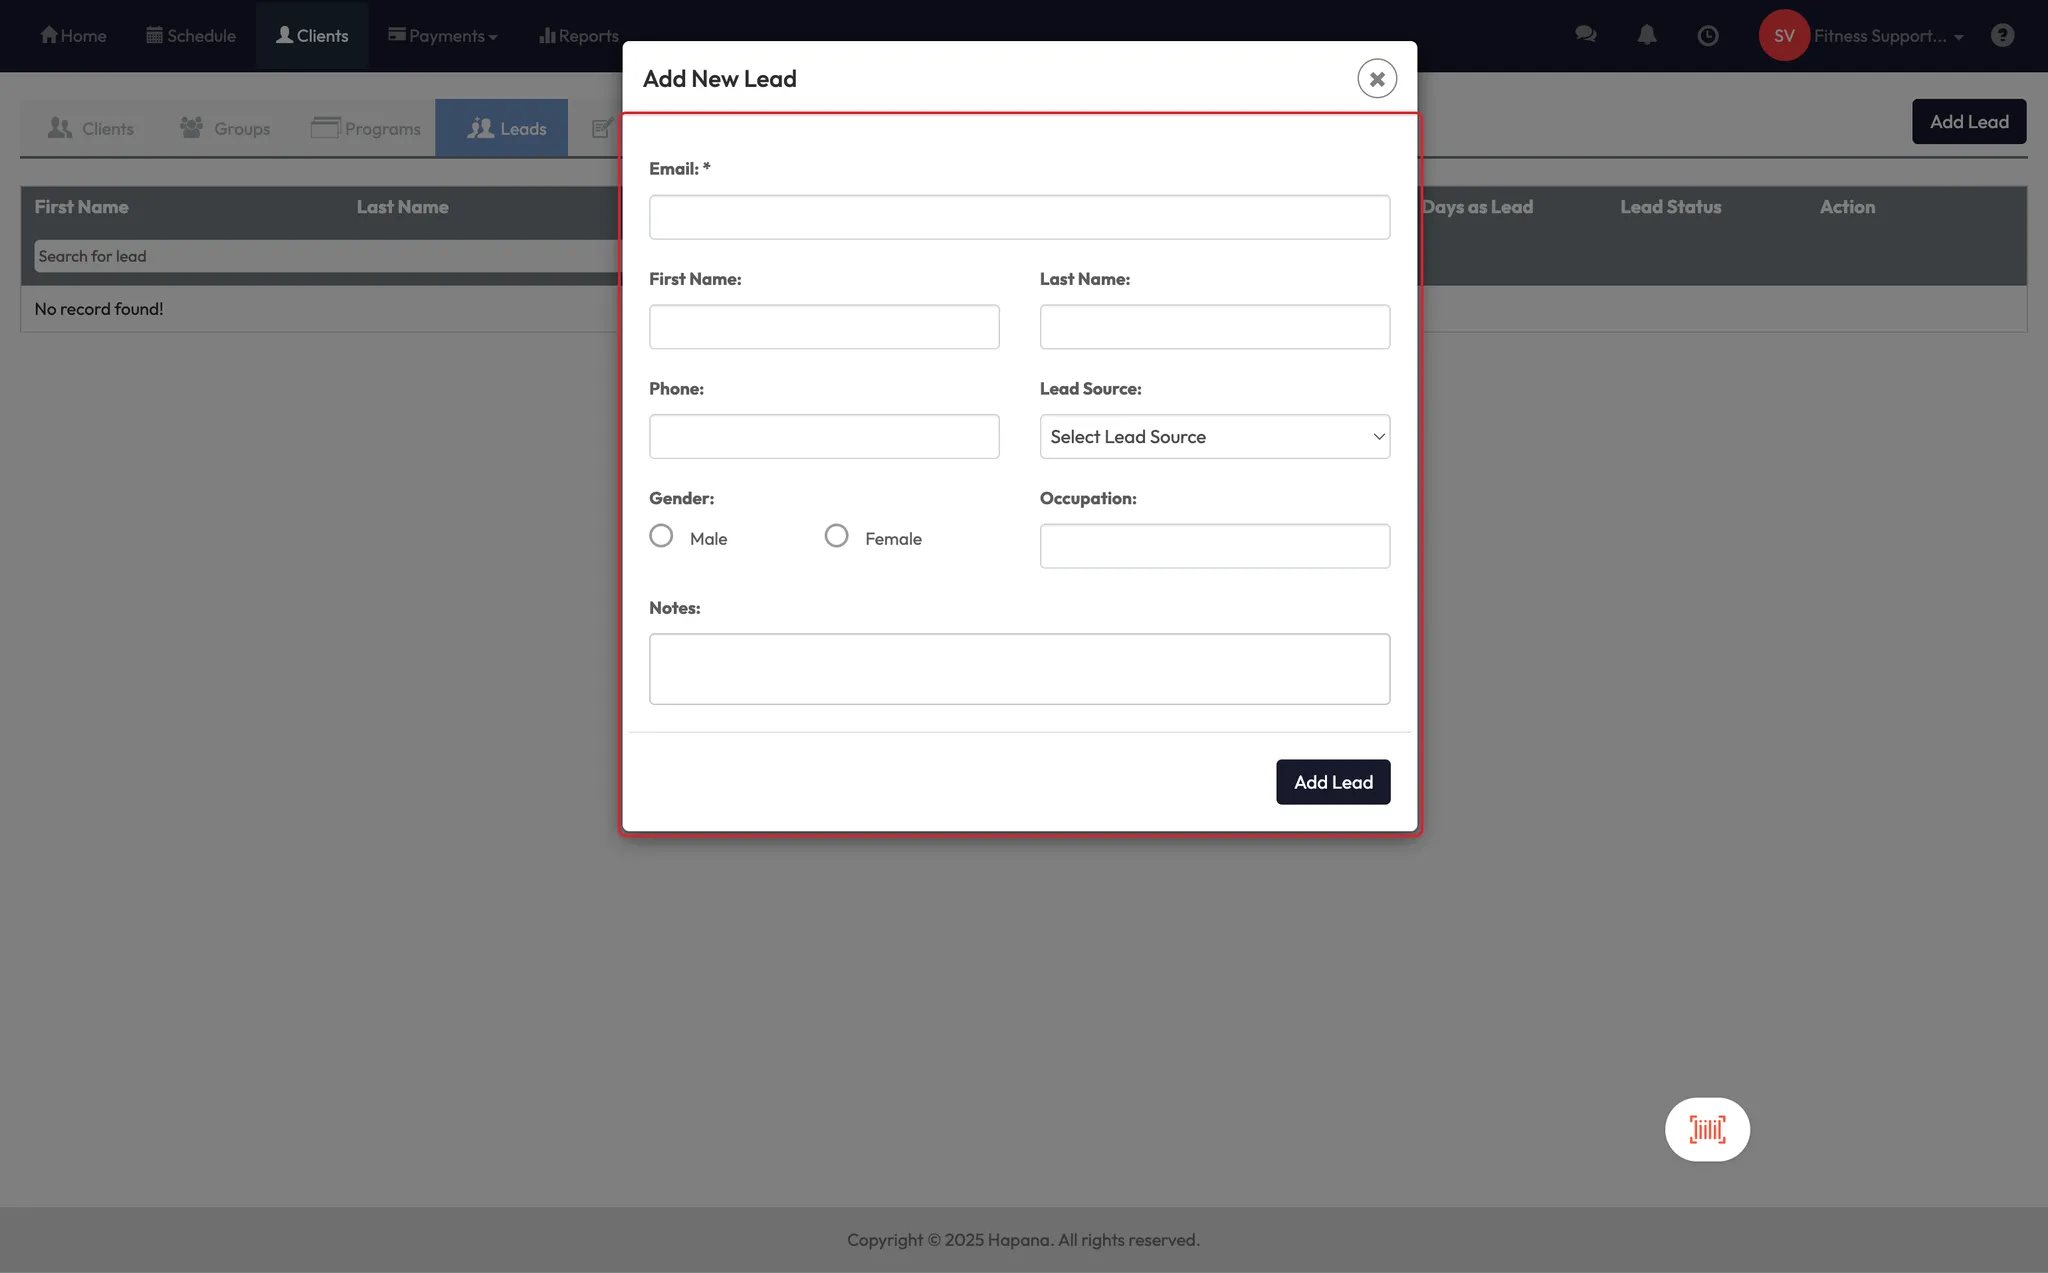
Step 2: Add a new lead
- Click Add Lead in the top right
- Enter the lead’s:
- Name
- Contact details (email, phone)
- Lead source (e.g., walk-in, referral, Instagram)
- Click Add Lead
The new lead will appear in your list instantly.


Step 3: Manage lead details
On each lead’s row, you’ll see:
- Assign to icon — to assign the lead to a staff member
- Edit icon — to update details
- Delete icon — to remove the lead from your system
✅ Assigning leads helps keep your sales pipeline organized and gives each staff member visibility on who they’re responsible for.

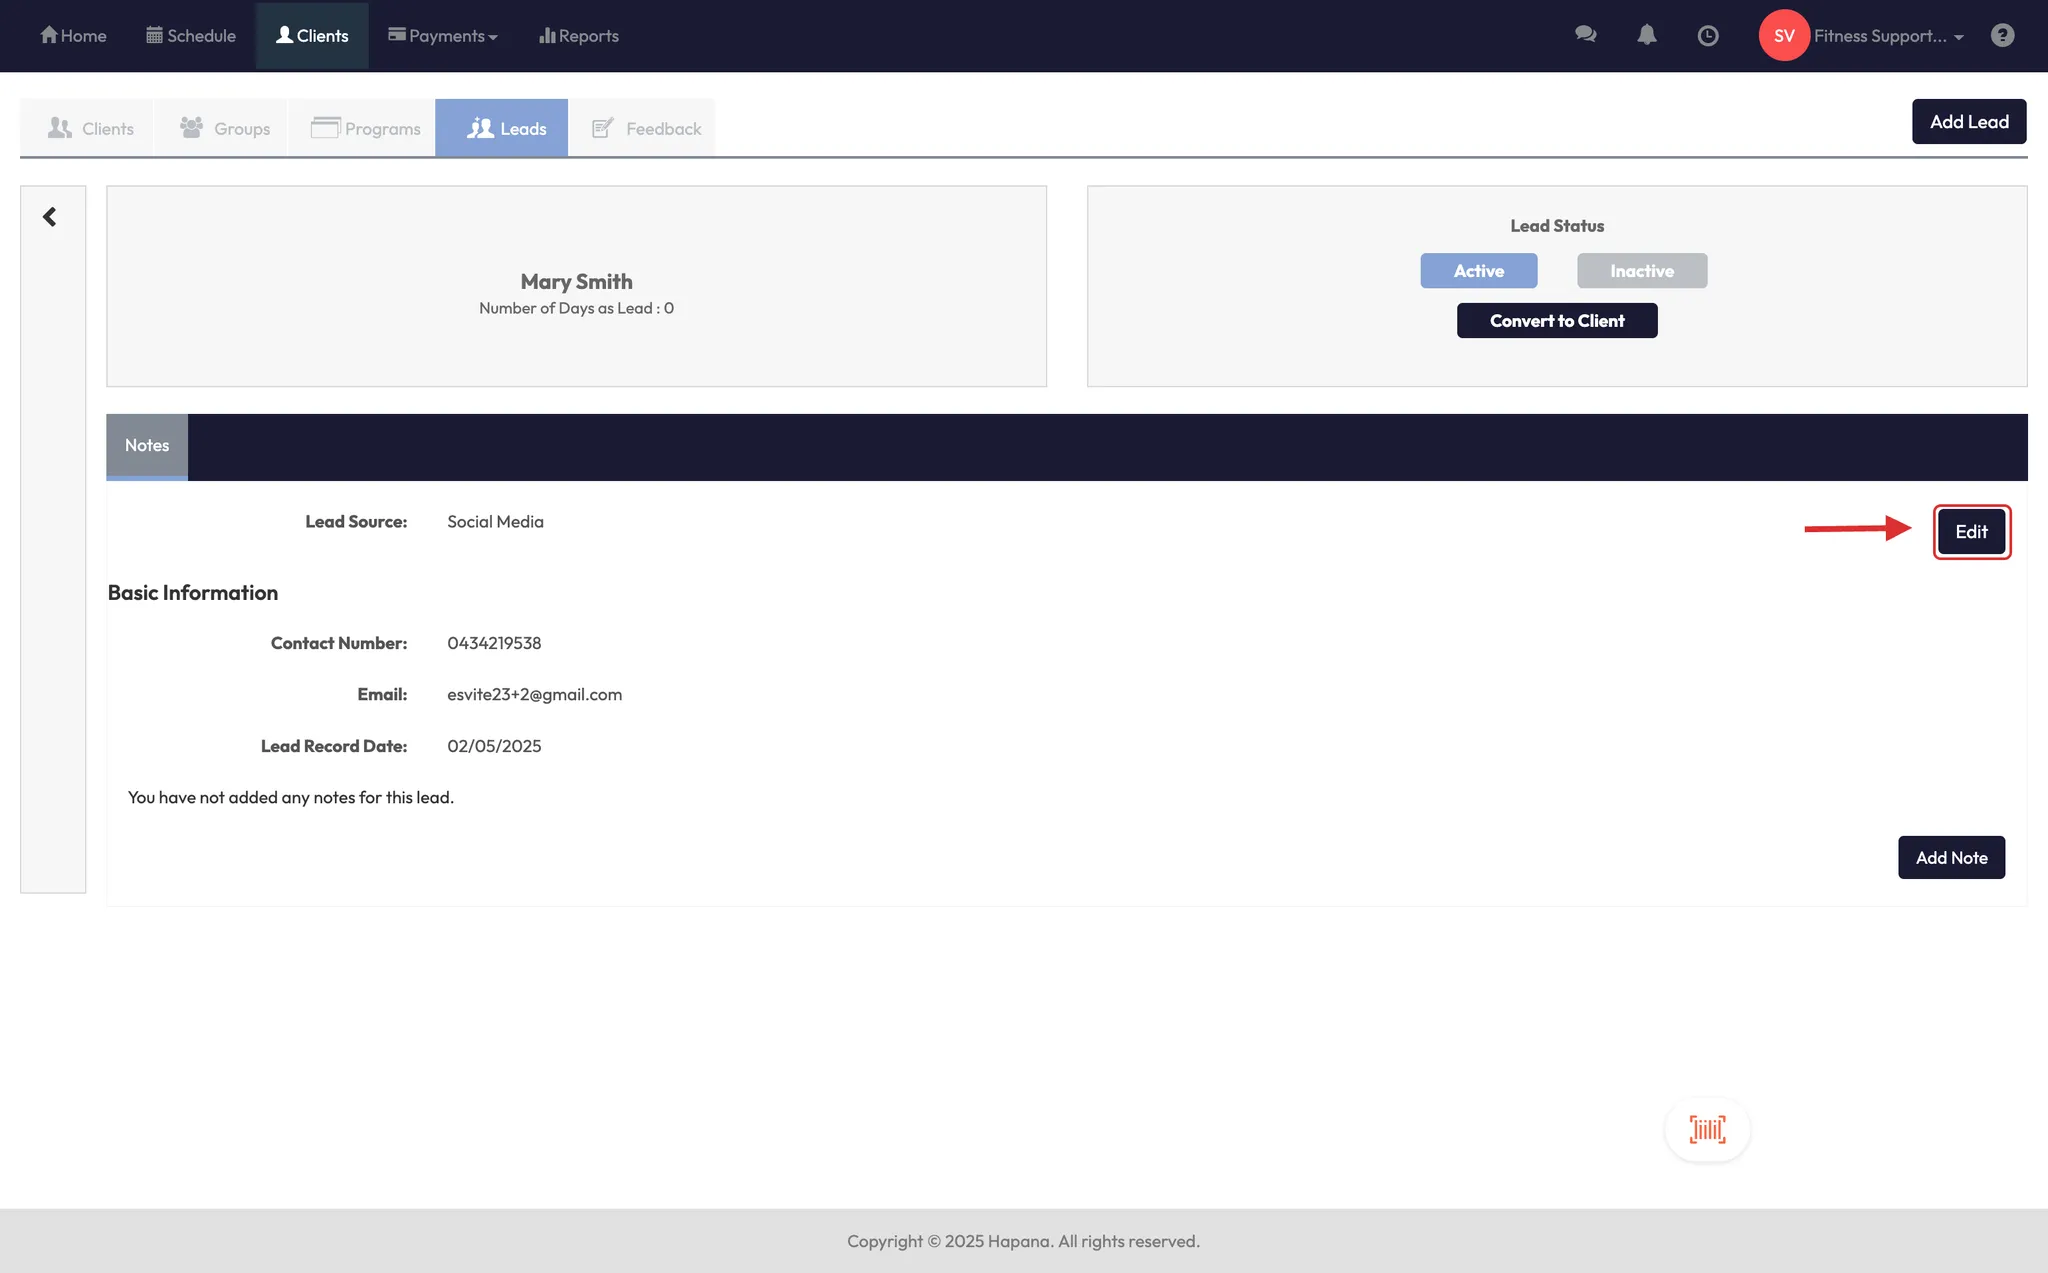
Step 4: Open and update lead profile
- Click the lead’s name to open their profile
- Here you can:
- View and edit contact info
- See lead source
- Add notes after phone calls or meetings
- At the top right, you’ll find the Lead Status dropdown
- Set the lead as Active, Inactive, or Convert to Client when ready
💡 Tip: Use notes to track every touchpoint — follow-up calls, trial class feedback, etc.


Expected outcome
Your lead will now be stored in CORE with their details, notes, and status. Once they sign up, they can be converted to a full client with one click.
FAQs
Q: Can I import leads in bulk?
A: This guide covers manual lead entry. For bulk imports, contact support or your onboarding specialist.
Q: Will leads receive automated emails or texts?
A: Not unless you assign them to a campaign. This process is for manual lead management.
Q: What happens when I convert a lead to a client?
A: The lead is moved into the Clients tab, where you can assign memberships, bookings, and more.
Still need help?
Reach out to our support team via [email protected]

