 986
986
Overview
Your Account Settings section is where most of the key business setup happens — including your calendar, check-in tools, communication settings, booking logic, and member-facing features. This guide gives a high-level overview of what each section does so you can confidently configure your location with your team or onboarding manager.
🎥 Watch the walkthrough:
Or preview it below:
Prerequisites
Before you begin:
- You must have admin access to the location
- Work with your onboarding team if you're setting this up for the first time
- Know your preferred booking rules, cancellation policies, and calendar preferences
Step-by-step overview of key settings
1. Calendar Settings
- Time zone and calendar start date
- Interval length (e.g., 30 minutes)
- Min/max calendar time range
- Enable continuous events (not recommended — use recurring instead)
- Default booking list order (by time or client name)


2. Client Sign-Up Fields
- Customize what info is required when a client signs up via the app
- Control fields for Client Mode (client-facing) and Business Mode (used by front desk)
- Add emergency contact, policies, forms, and custom properties

3. Business Profile
- Set which tabs appear in the app (e.g., Classes, Packages, Workshops)
- Choose the default tab when clients open the app
- Configure client profile tabs (Notes, Schedule, Payments, etc.)
- Choose default tab when staff view a client file

4. Booking and Class Display
- Set default calendar view (calendar/list/team)
- Enable multiple reservations per client
- Customize booking request confirmations (auto or manual)
- Auto-deduct credits
- Customize color-coding for fully paid vs unpaid classes
- Enable or disable drag and drop scheduling
- Hide unbooked rooms or team members from views

5. Reservation and Cancellation Rules
- Days to display: how far ahead clients can see the schedule
- Timed vs rolling release: when classes become bookable
- Set how far in advance clients can cancel classes, privates, or workshops
- Set waitlist lock periods and rules
- Decide if clients need valid credits to join a waitlist

6. Client Check-In Settings
- Enable check-in pop-ups, check-in widget, and sound alerts
- Configure barcode scanning and refresh intervals
- Allow or restrict mobile check-in

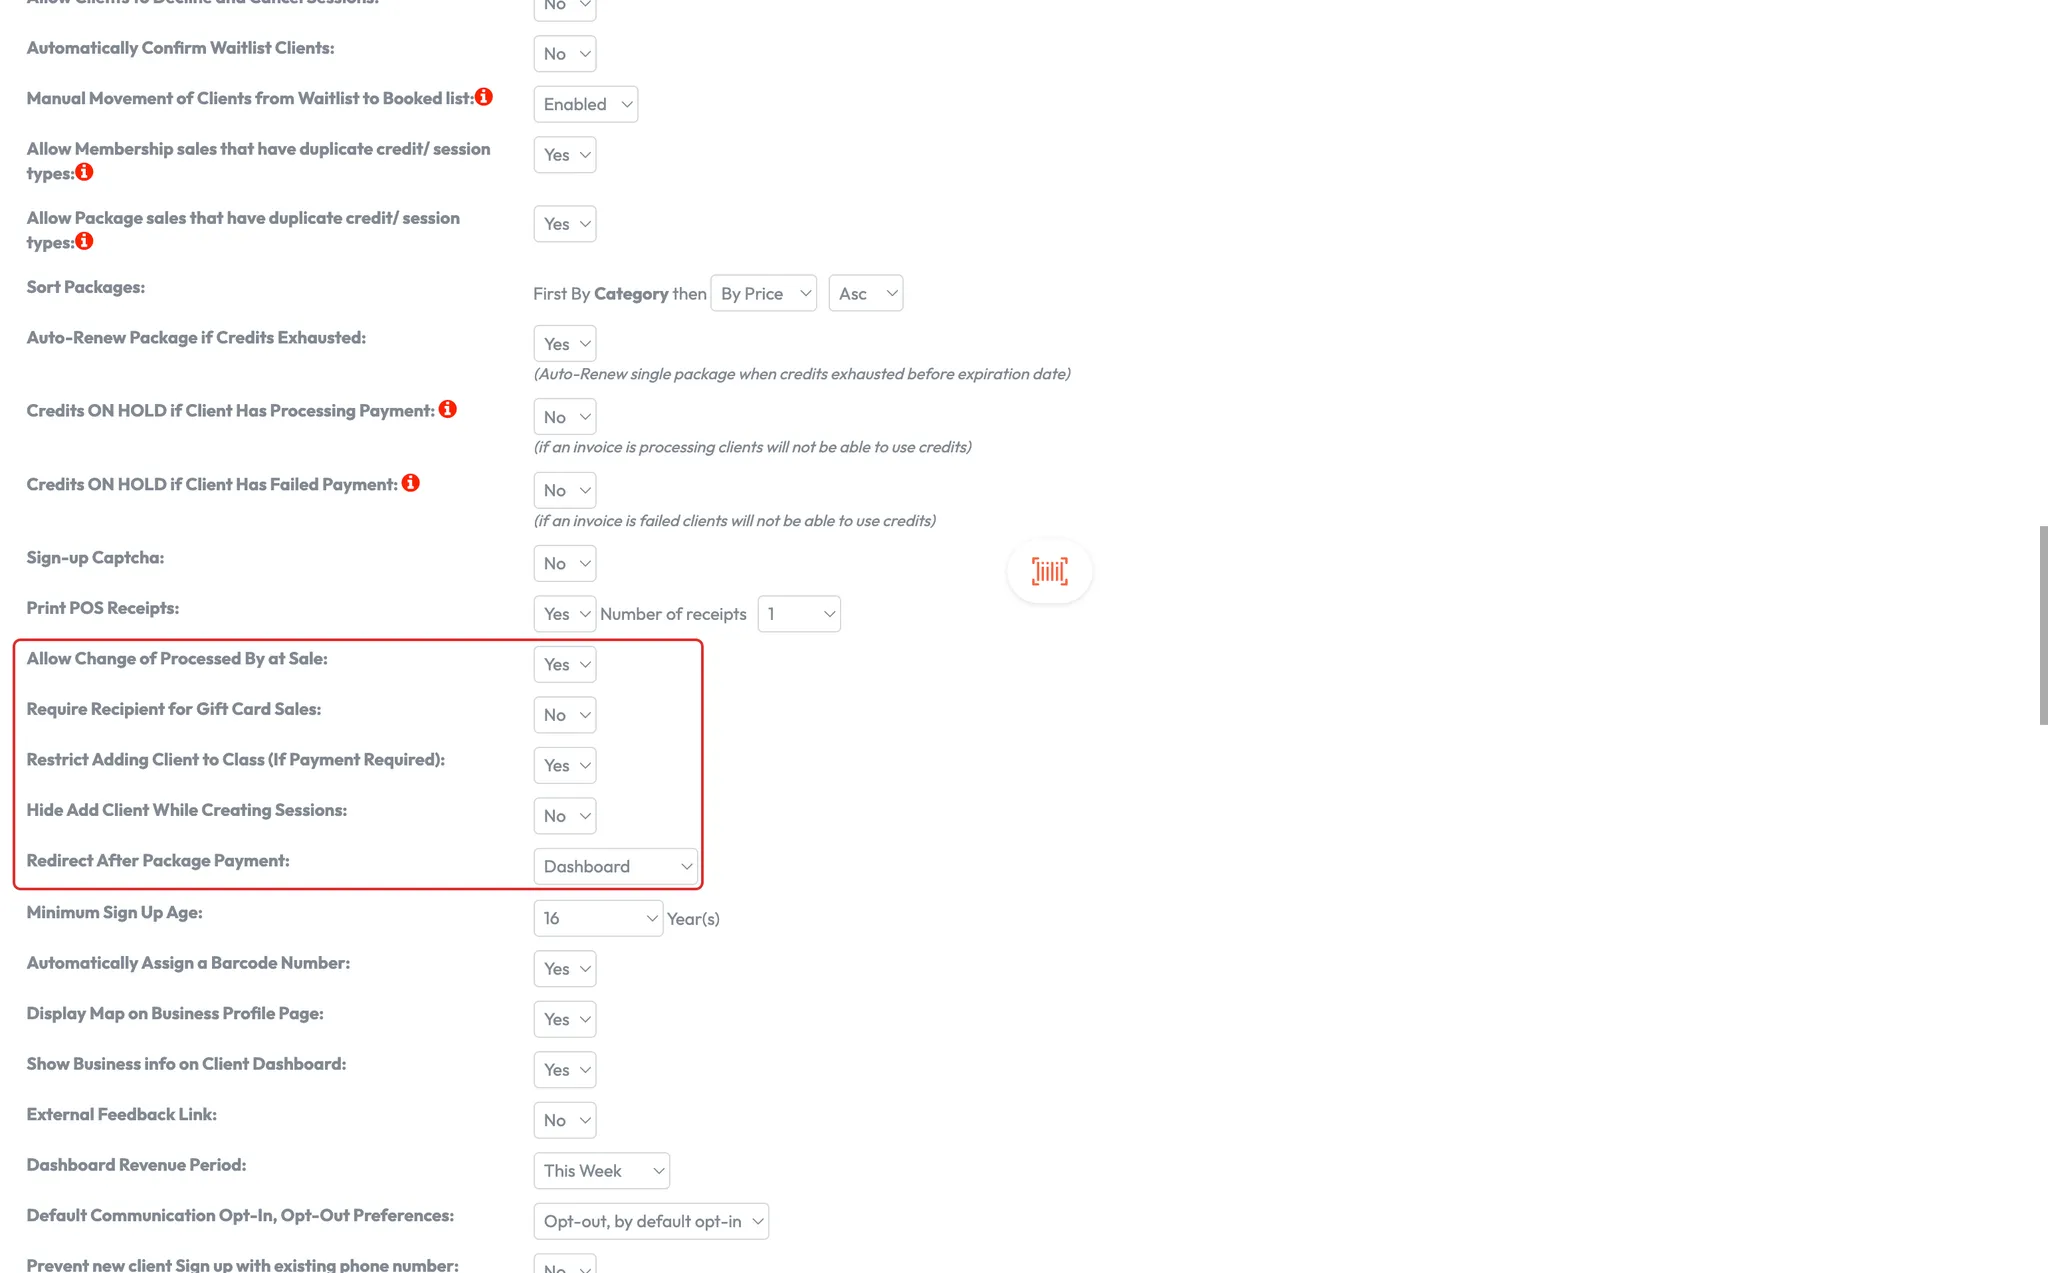
7. Sales and Packages
- Enable cash drawer and assign access by team group
- Allow or restrict duplicate sales of credits or packages
- Sort packages by price or name
- Enable auto-ordering of new packages when credits run out
- Set redirect after package sale

8. POS and Membership Sales
- Allow staff to choose who processed a sale
- Require gift card recipients
- Restrict client from being added to class if payment is owed
- Hide Add Client button during class creation

9. Communication & Triggers
- Set minimum sign-up age and auto-assign barcodes
- Configure external feedback links
- Set default communication opt-in/opt-out logic
- Prevent sign-ups with reused phone numbers
- Enable or disable email/SMS triggers
- Edit content for automated messages
- Set blackout periods for when messages won’t send (e.g., 10pm–5am)

10. Referral Settings
- Decide if credits go to the referrer or new client
- Toggle settings on/off under the Referral section

Expected outcome
You’ll have your entire account configuration aligned with how your studio runs — from booking behavior and calendar views to client communication and class rules. These settings help make your workflows consistent and easy for both staff and clients.
FAQs
Q: Do I need to update all these settings at once?
A: No, start with calendar, client sign-up fields, and booking rules. The rest can be refined over time.
Q: Will clients see these changes instantly?
A: Yes, most settings apply in real time once saved.
Q: Can I have different settings for each location?
A: Yes, settings are location-specific and must be configured per site.
Still need help?
Reach out to our support team via [email protected]


