
 633
633
Overview
This guide walks you through the Client Profile section in Core. It’s where you manage each client’s details—contact info, sessions, payments, memberships, alerts, and more—all in one place. Knowing how to use this page helps you keep records clean, update billing, support members better, and take action fast when needed.
🎥 Watch the walkthrough:
Or preview it below:
Prerequisites
- Access to the Core platform
- At least one client profile in your system
- Relevant staff permissions (admin or team member access)
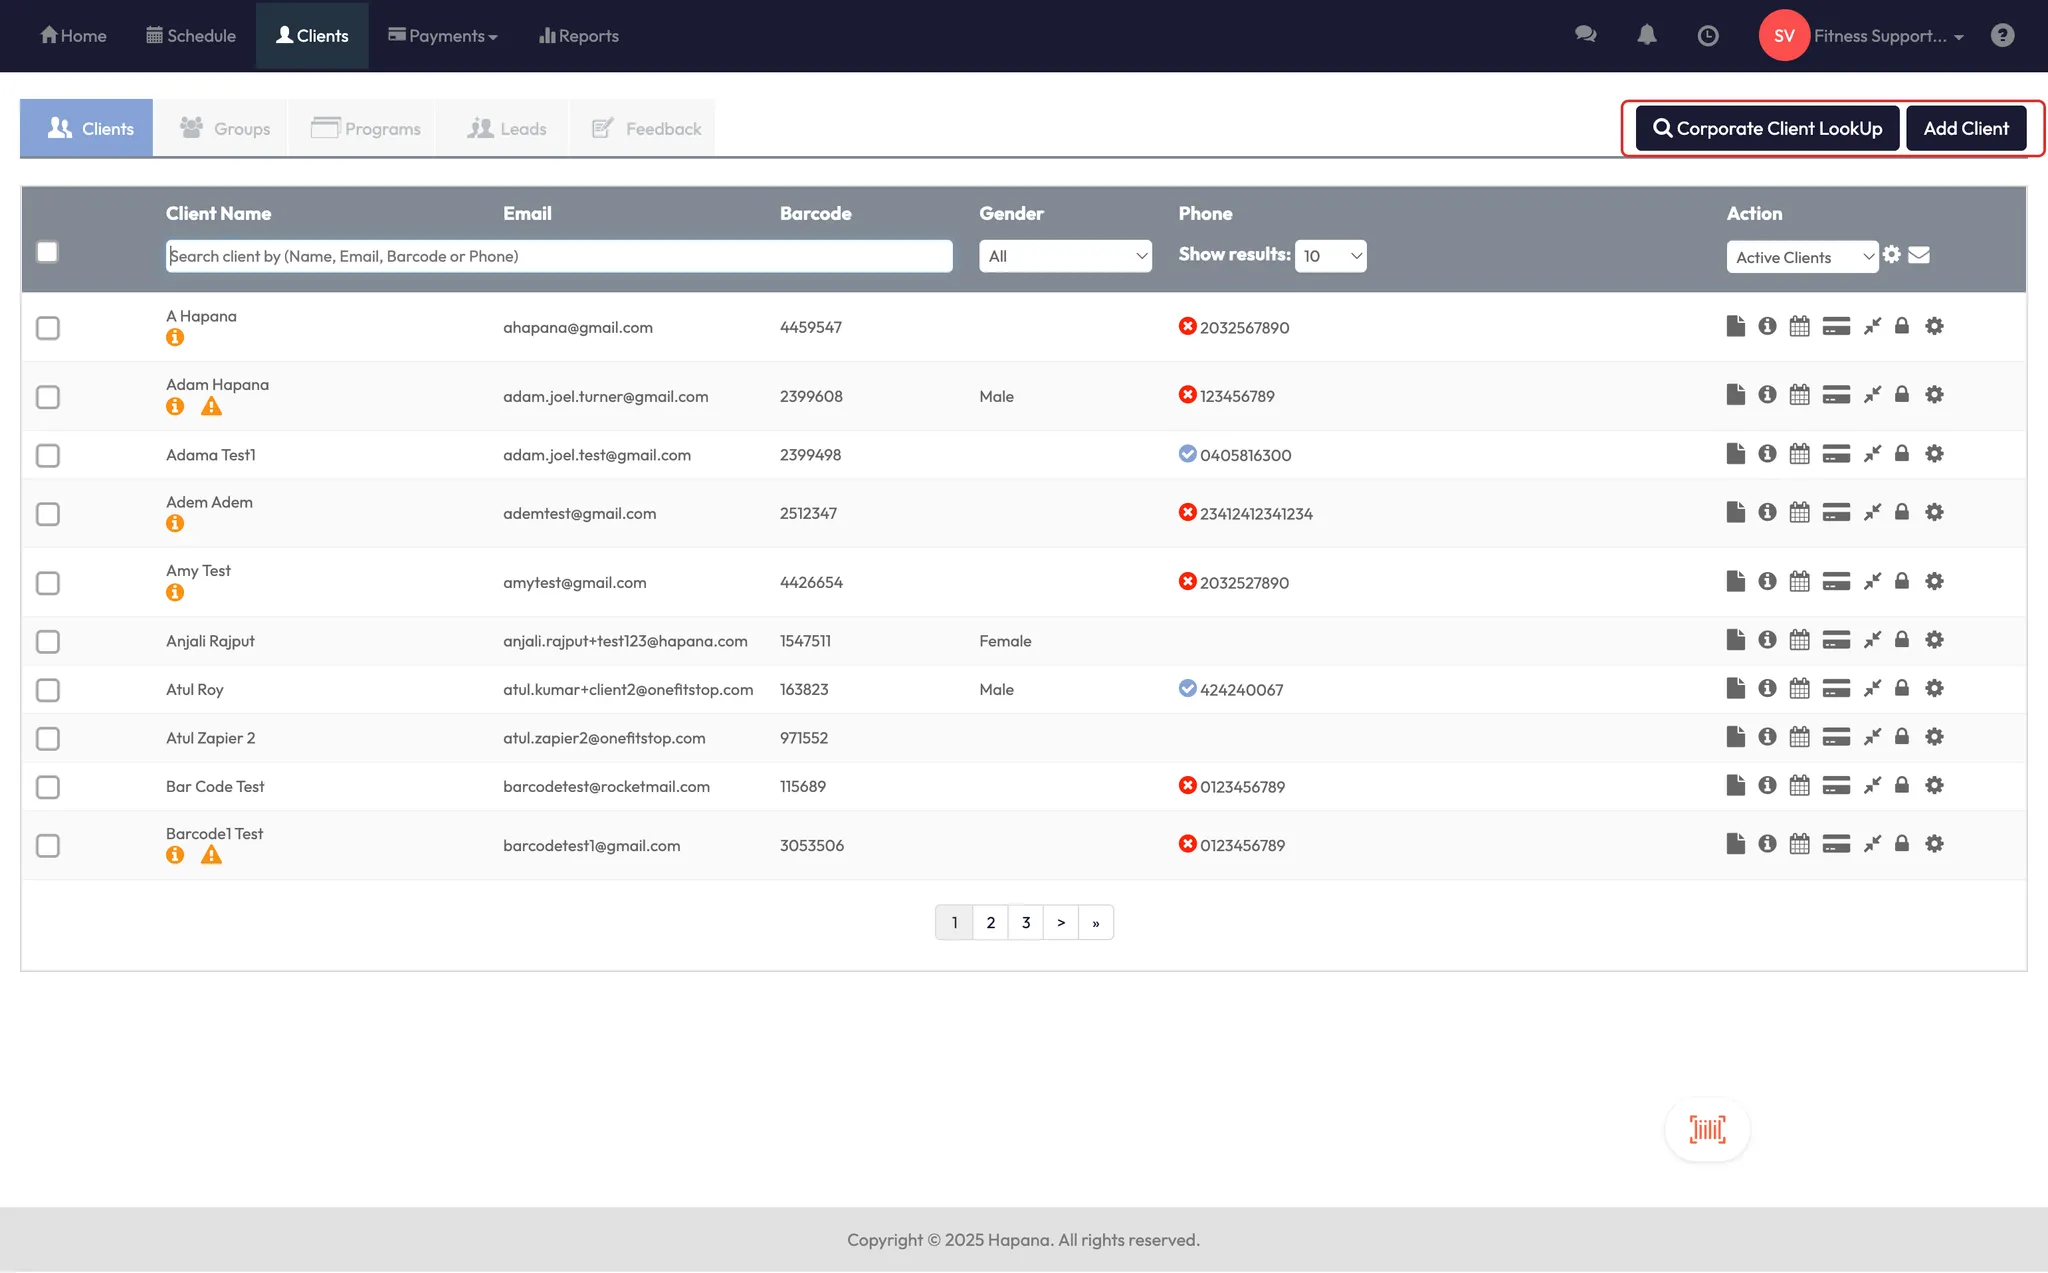
Step 1: Open the client list
- In Core, click Clients in the top menu.
- You’ll land on the client dashboard, where you can:
- Search for clients
- Use Corporate Client Lookup to find clients from other locations
- Click Add Client to create a new profile
Tip: Corporate Client Lookup lets you temporarily train a client at a different location than their home site.

Step 2: Understand the action icons
On the client dashboard (before clicking into a profile), you’ll see icons to:
- Merge Clients
- Send New Password
- Update Status
Tip: Only these three options are available outside of the full profile view.


Step 3: Merge duplicate clients
- Click the client profile you want to merge from.
- Search and select the client you want to merge into.
- The system will combine their data into the destination profile.
Tip: Cancel any active memberships or packs on the profile you're merging from—this avoids billing conflicts later.


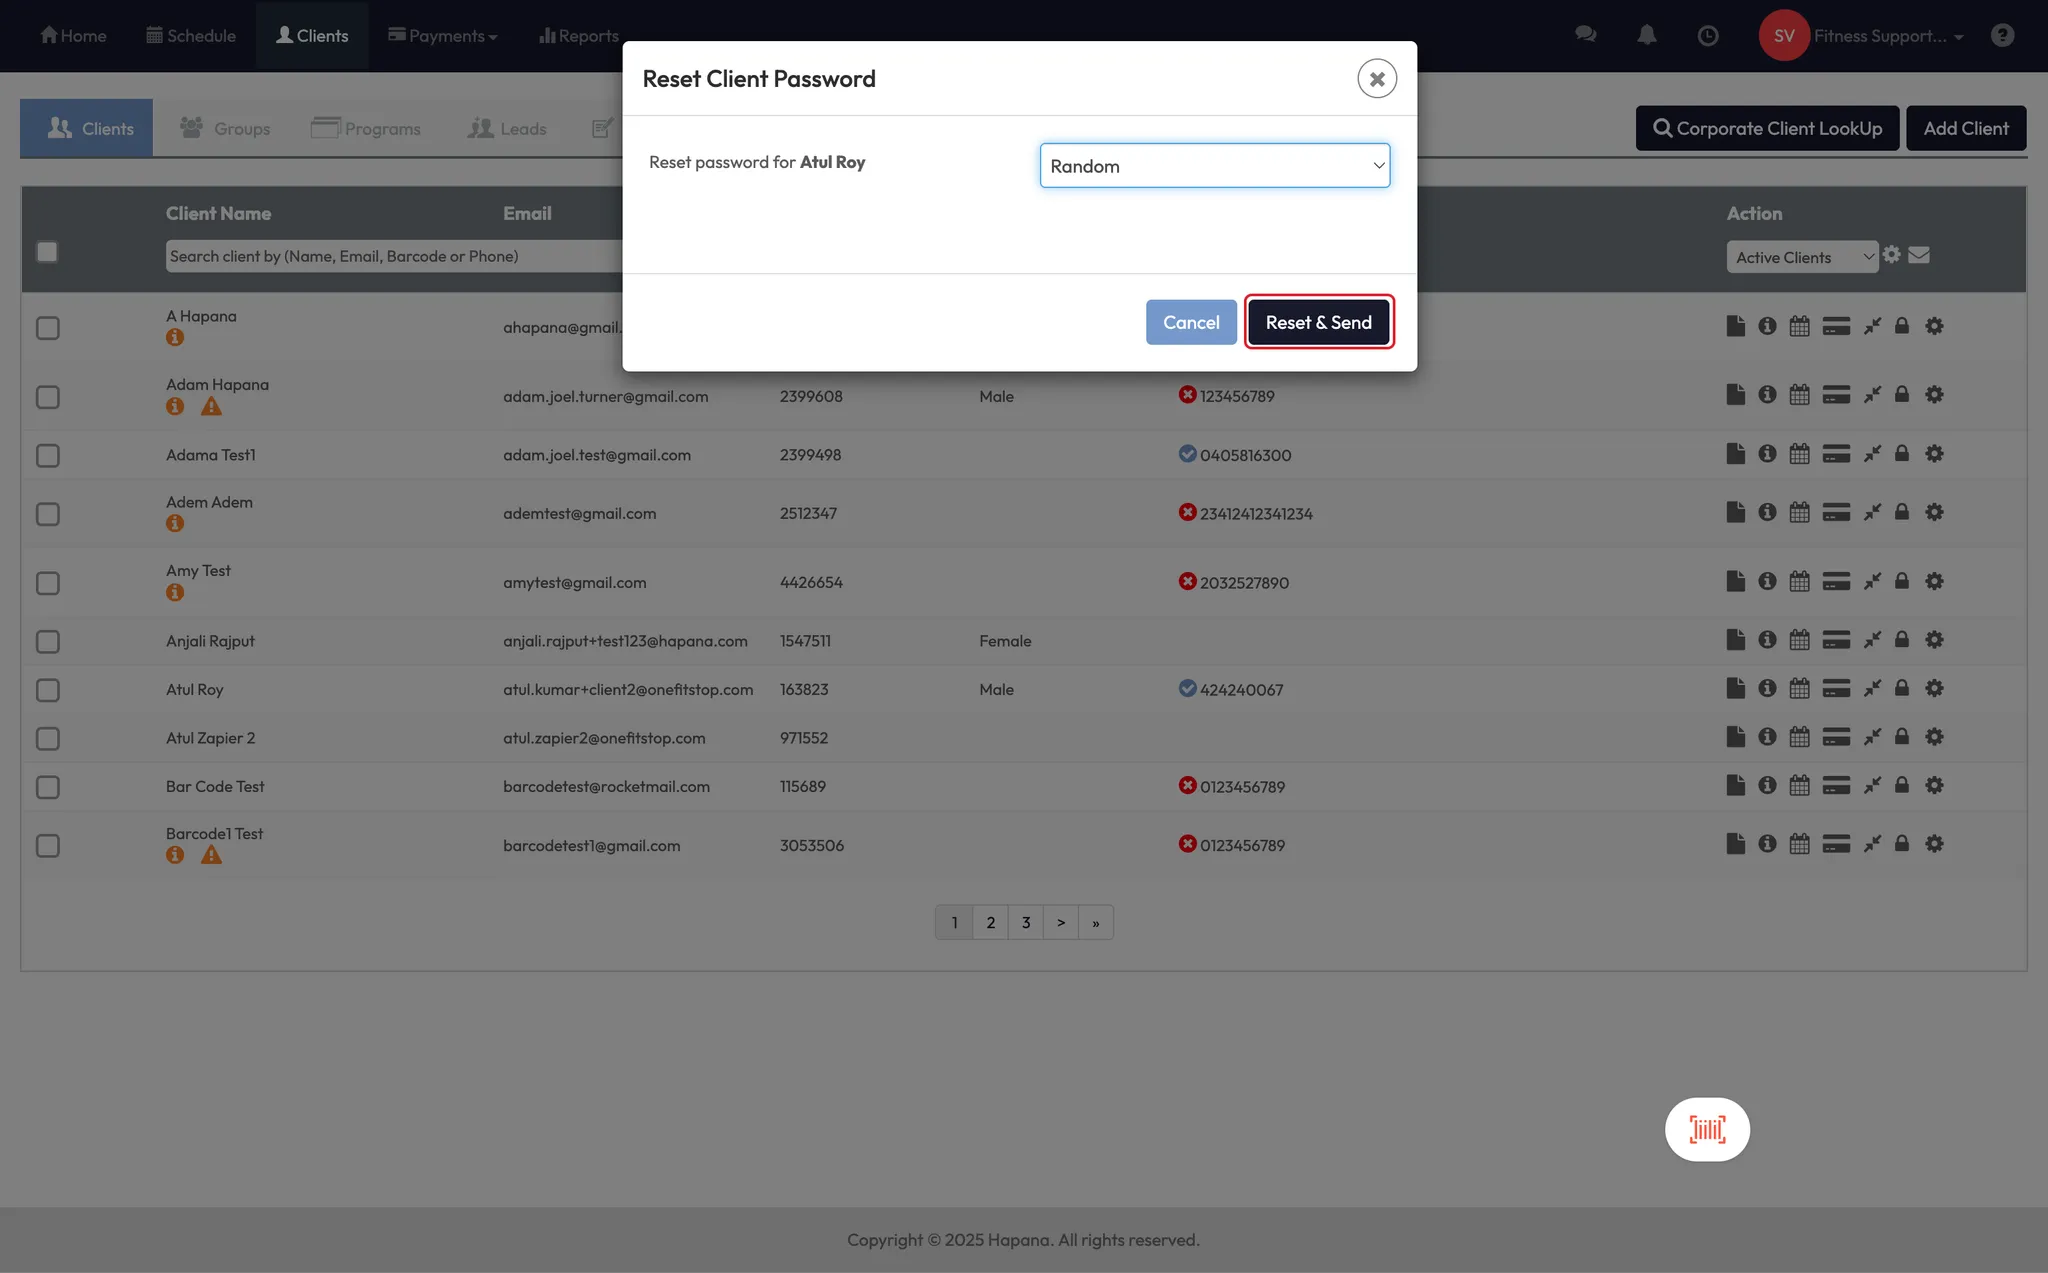
Step 4: Send a new password
- From the dashboard, click Send New Password.
- Choose to send a random or custom password via email.
Tip: Use this if a client can’t log into their app or web account.

Step 5: Update client status
- Select a client, then click Update Status.
- Choose between: Active, Alumni, Removed, or Deleted
Tip: Be cautious—Deleted wipes the profile completely, while Removed keeps it in your reports. Always cancel memberships before changing status to avoid ongoing charges.


Step 6: View and edit client profile
- Click on any client to open their full profile.
- At the top, you’ll see:
- Alerts
- Custom Properties
- View/Change Card
- Quick buttons for Add Client, View Session, and New Sale


Step 7: Add custom alerts
- Click the Alert tab.
- Add notes like “Back injury” or “Left keys at desk” to display during bookings.
Tip: Trainers will see alerts when clients book classes or check in.


Step 8: Manage notes, files, and forms
- Notes: Choose to hide them from the client (especially sensitive notes).
- Files: Upload any relevant documents.
- Forms: Send pre-built forms (like pre-exercise questionnaires) and track status.
Tip: Clients can only view notes via the web—not the app.


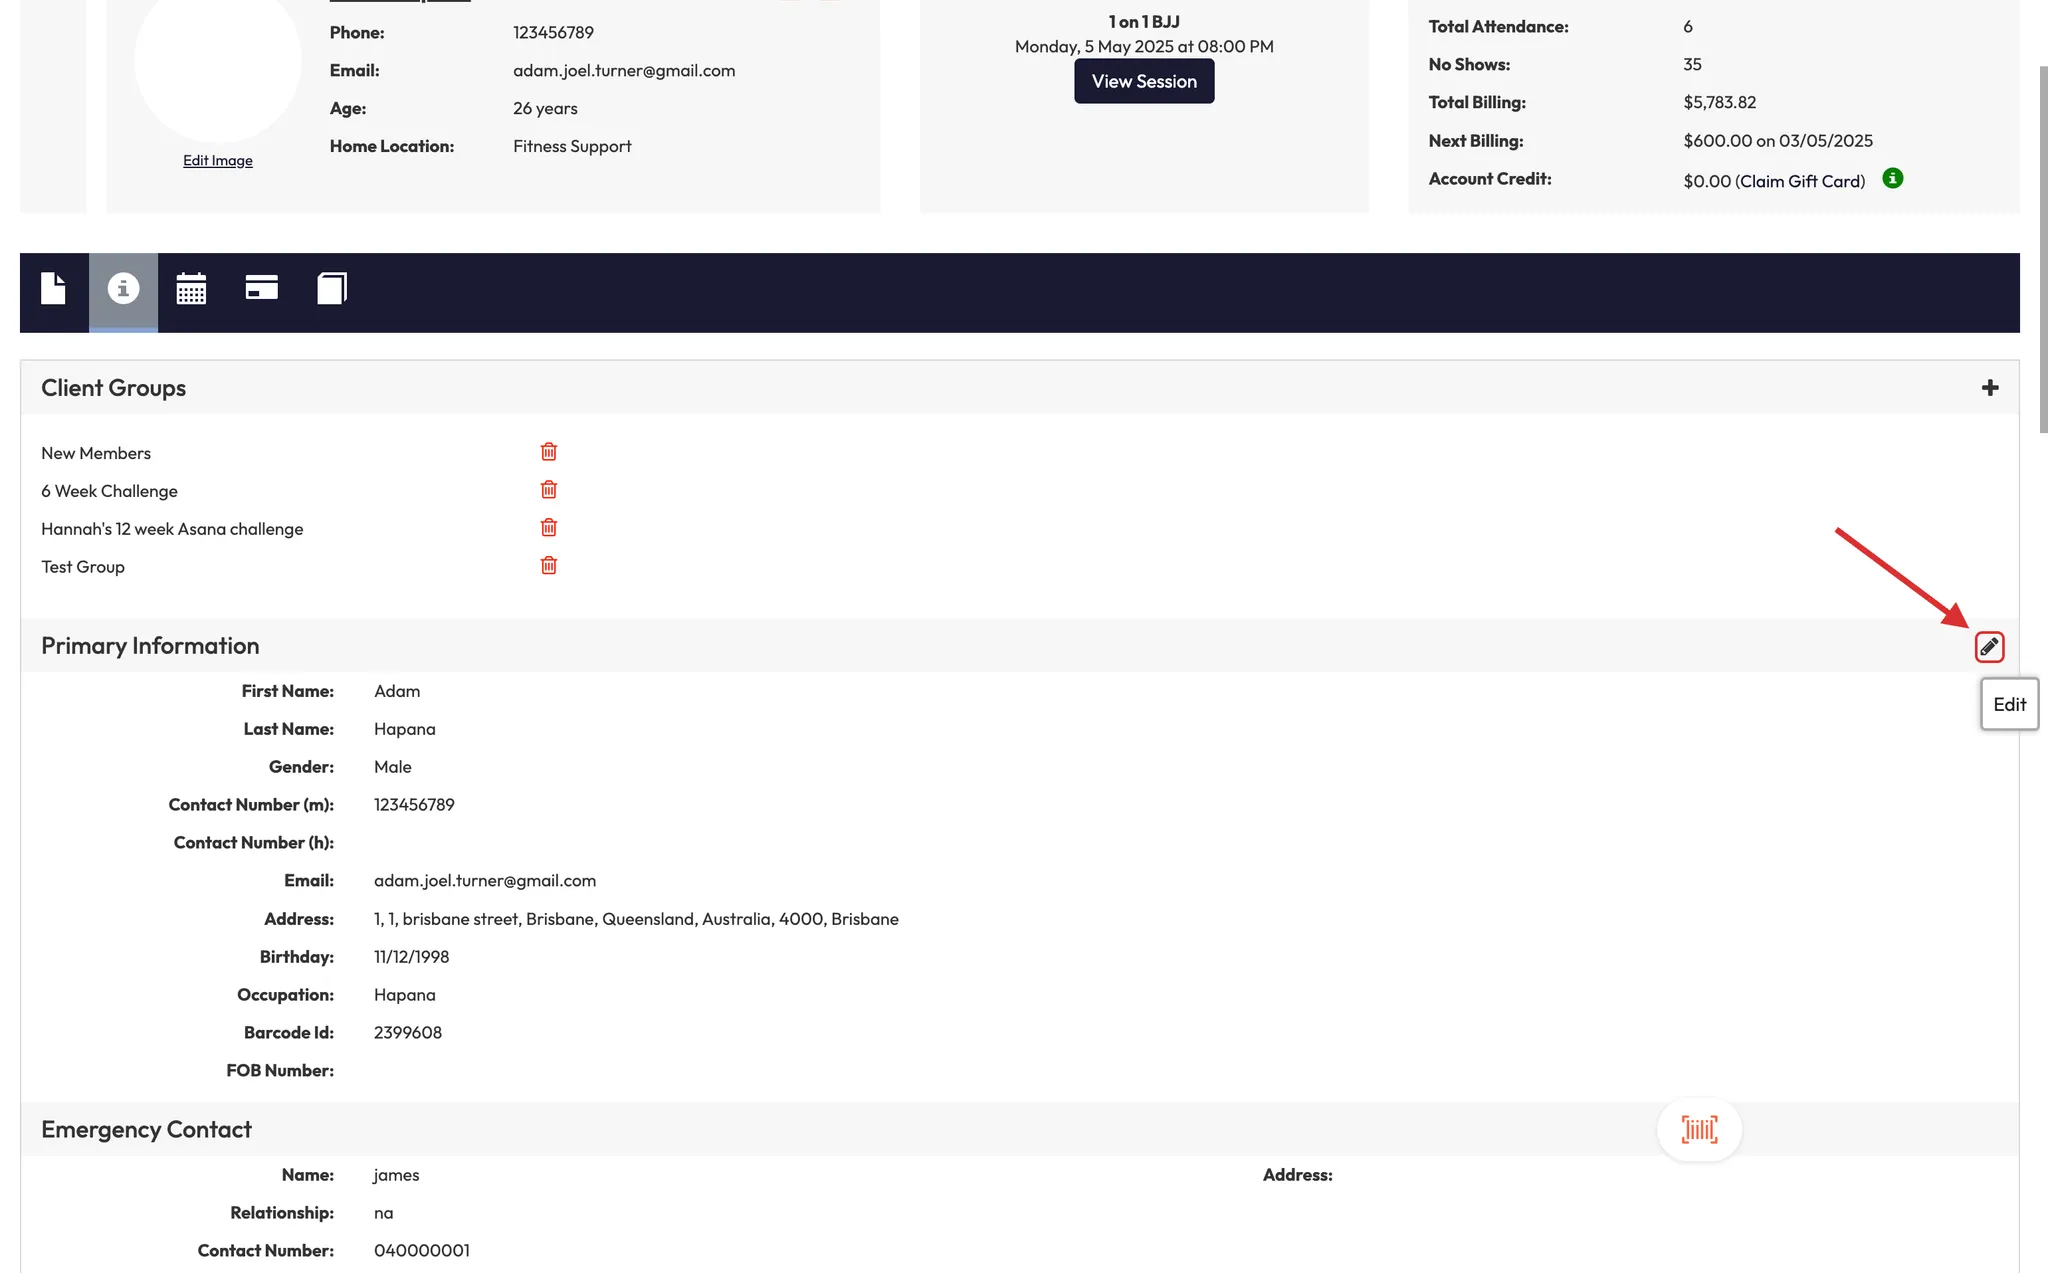
Step 9: View and edit personal info
- Scroll to Client Information to see contact details, emergency contact, ID, and more.
- Click the pencil icon to edit.

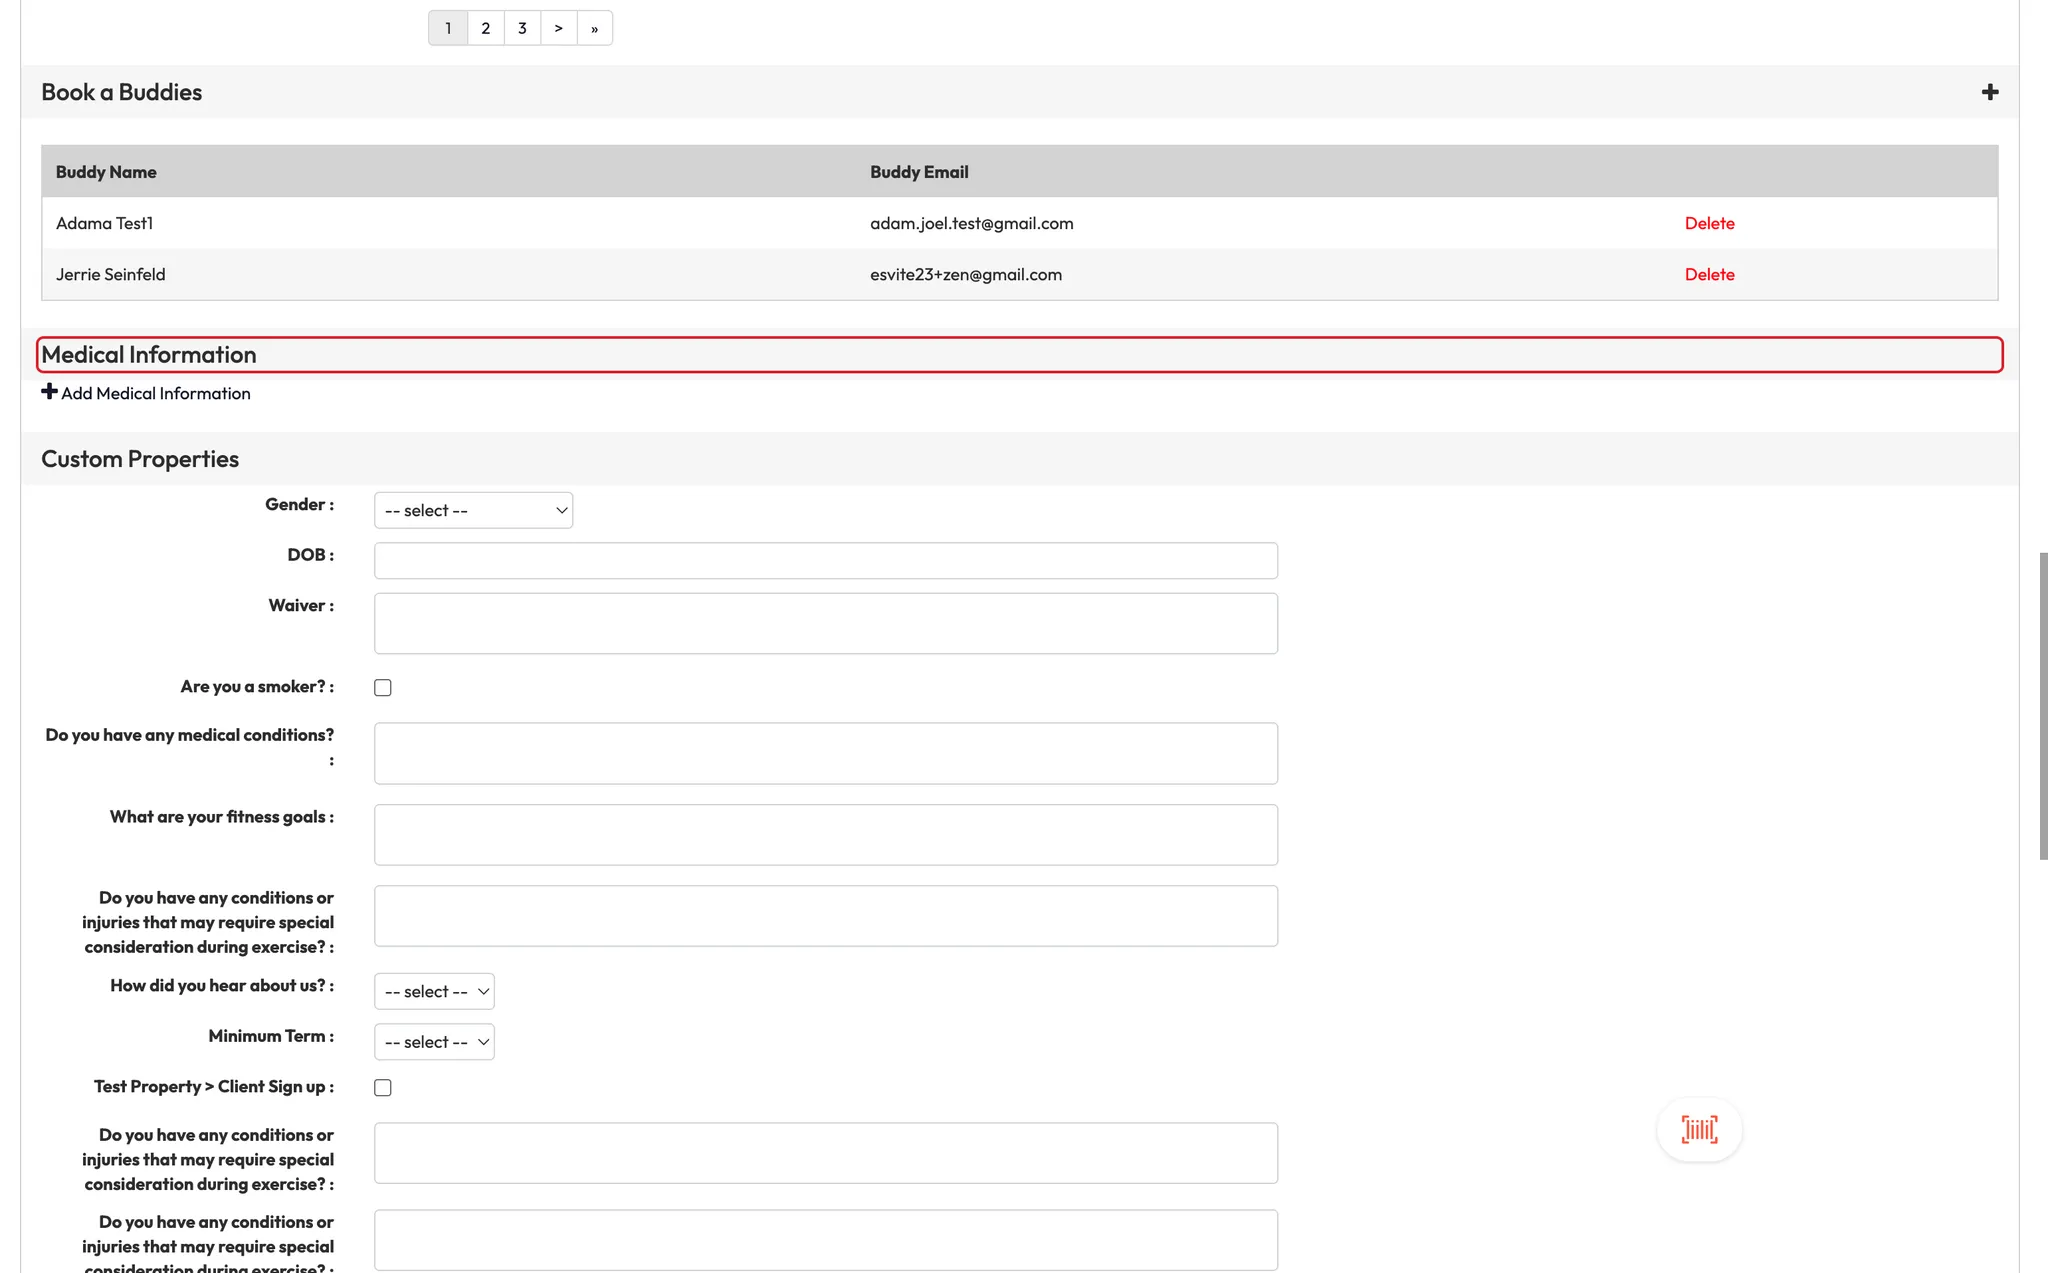
Step 10: Manage relationships and Book-a-Buddy
- Add linked profiles like parents/kids or training buddies.
- For Book-a-Buddy, both profiles must have an active membership or pack.

Step 11: Update medical and custom properties
- Use Medical for injury or health notes.
- Use Custom Properties to track signup info or other business-specific details.
Step 12: Use account balance and lead source
- Apply account credits to recurring payments.
- View where a client came from (e.g., social media, referral).

Step 13: Track communications and delete profile
- See client opt-ins for emails or SMS.
- If deleting a client, clear all outstanding payments, sessions, and memberships first.


Step 14: View agreements and policies
- Agreements include a signature and can be downloaded.
- Policies are just checkbox agreements with a timestamp.

Step 15: Manage client schedule and activity
- View booked, past, and cancelled sessions.
- Add sessions manually.
- Review check-ins and class activity logs.


Step 16: View and adjust payments
- See all packages and memberships.
- Adjust credit expiry, add/deduct credits.
- View shared locations, show visits, and payment logs.


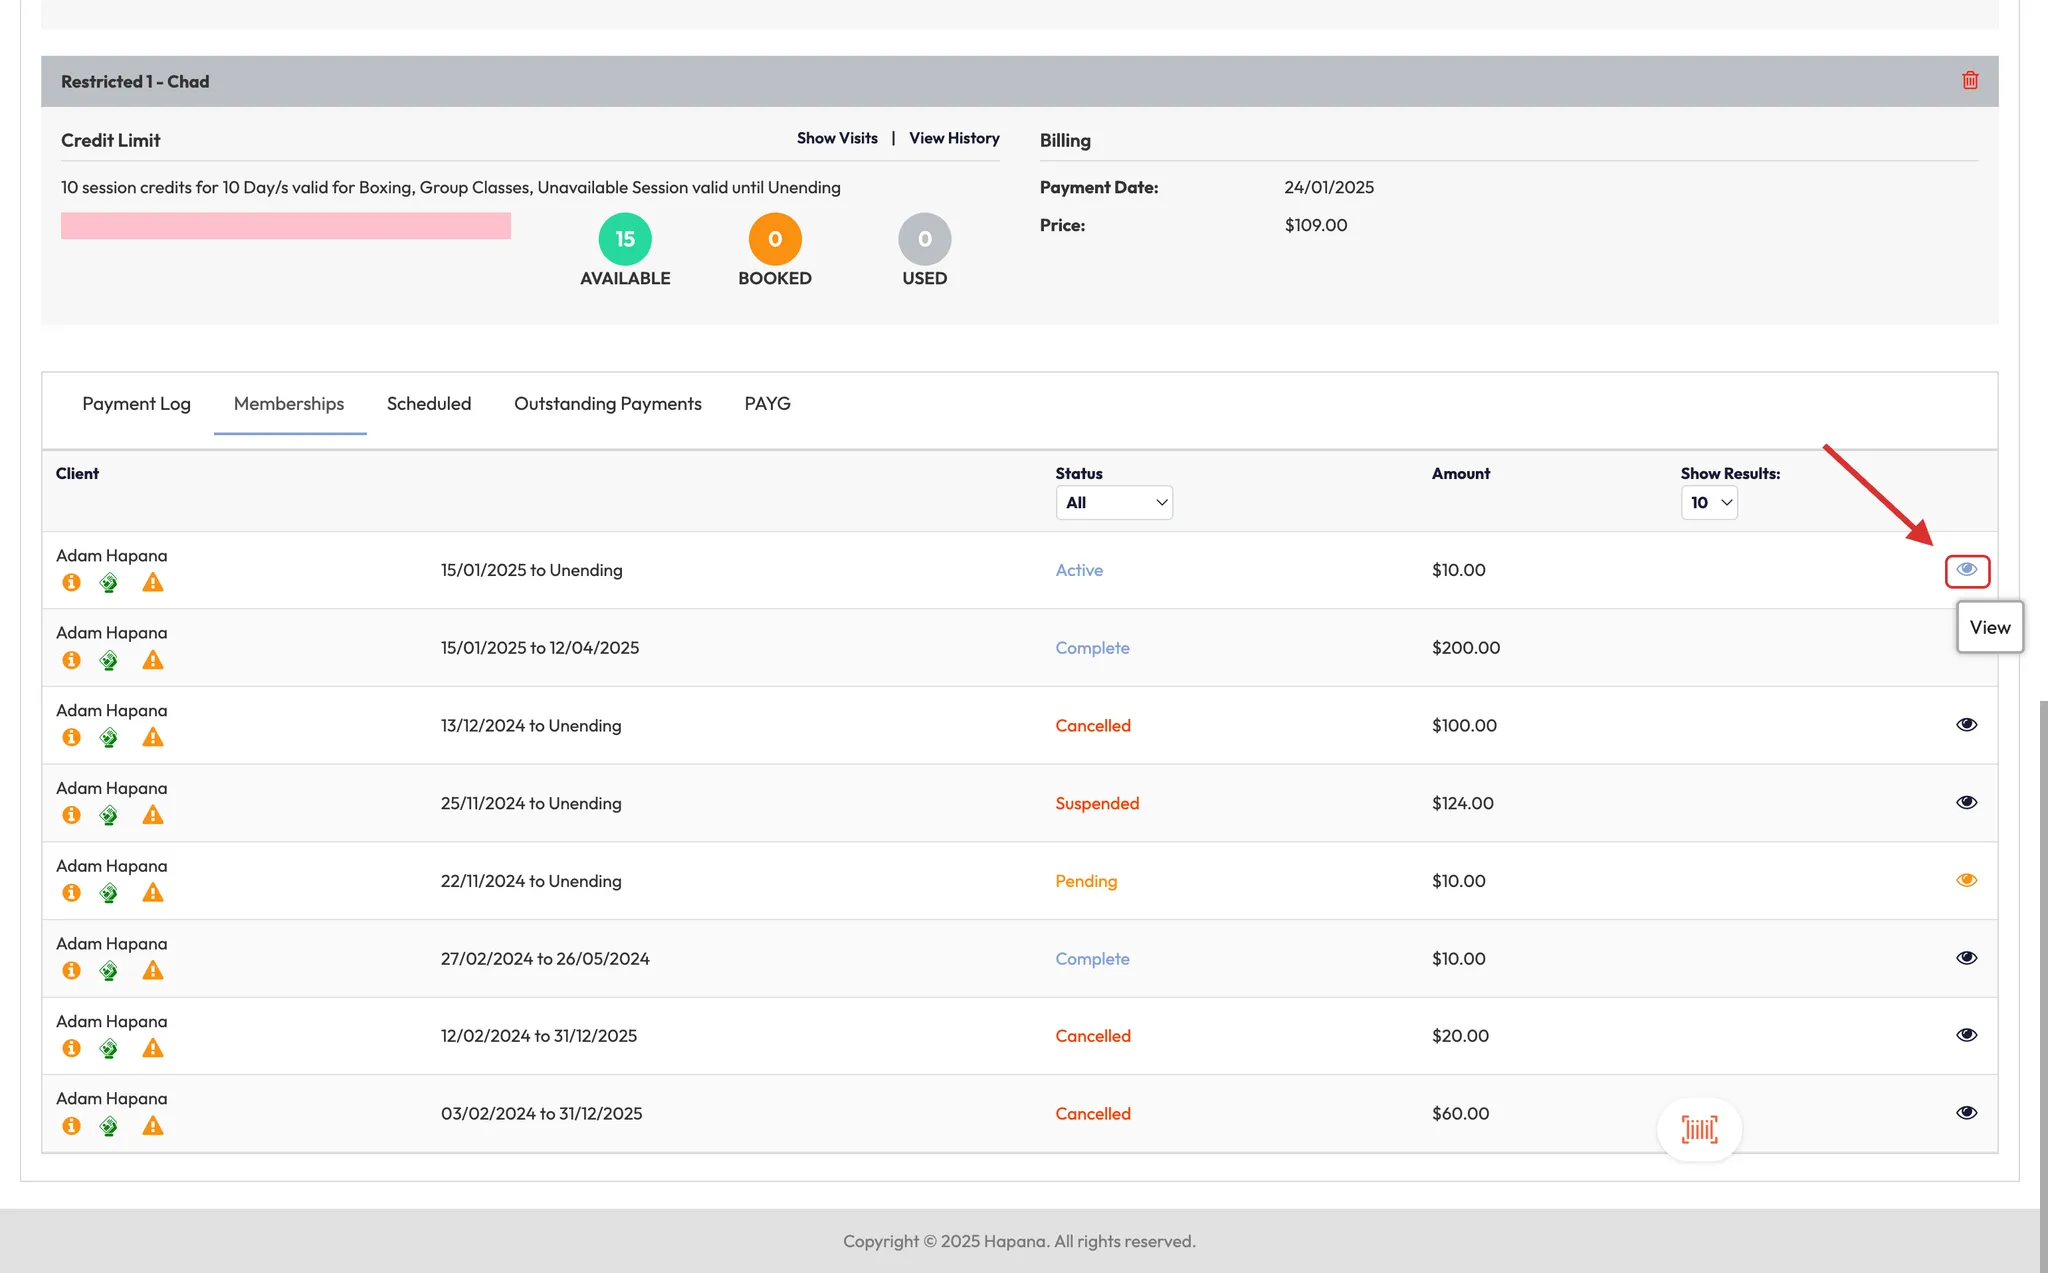
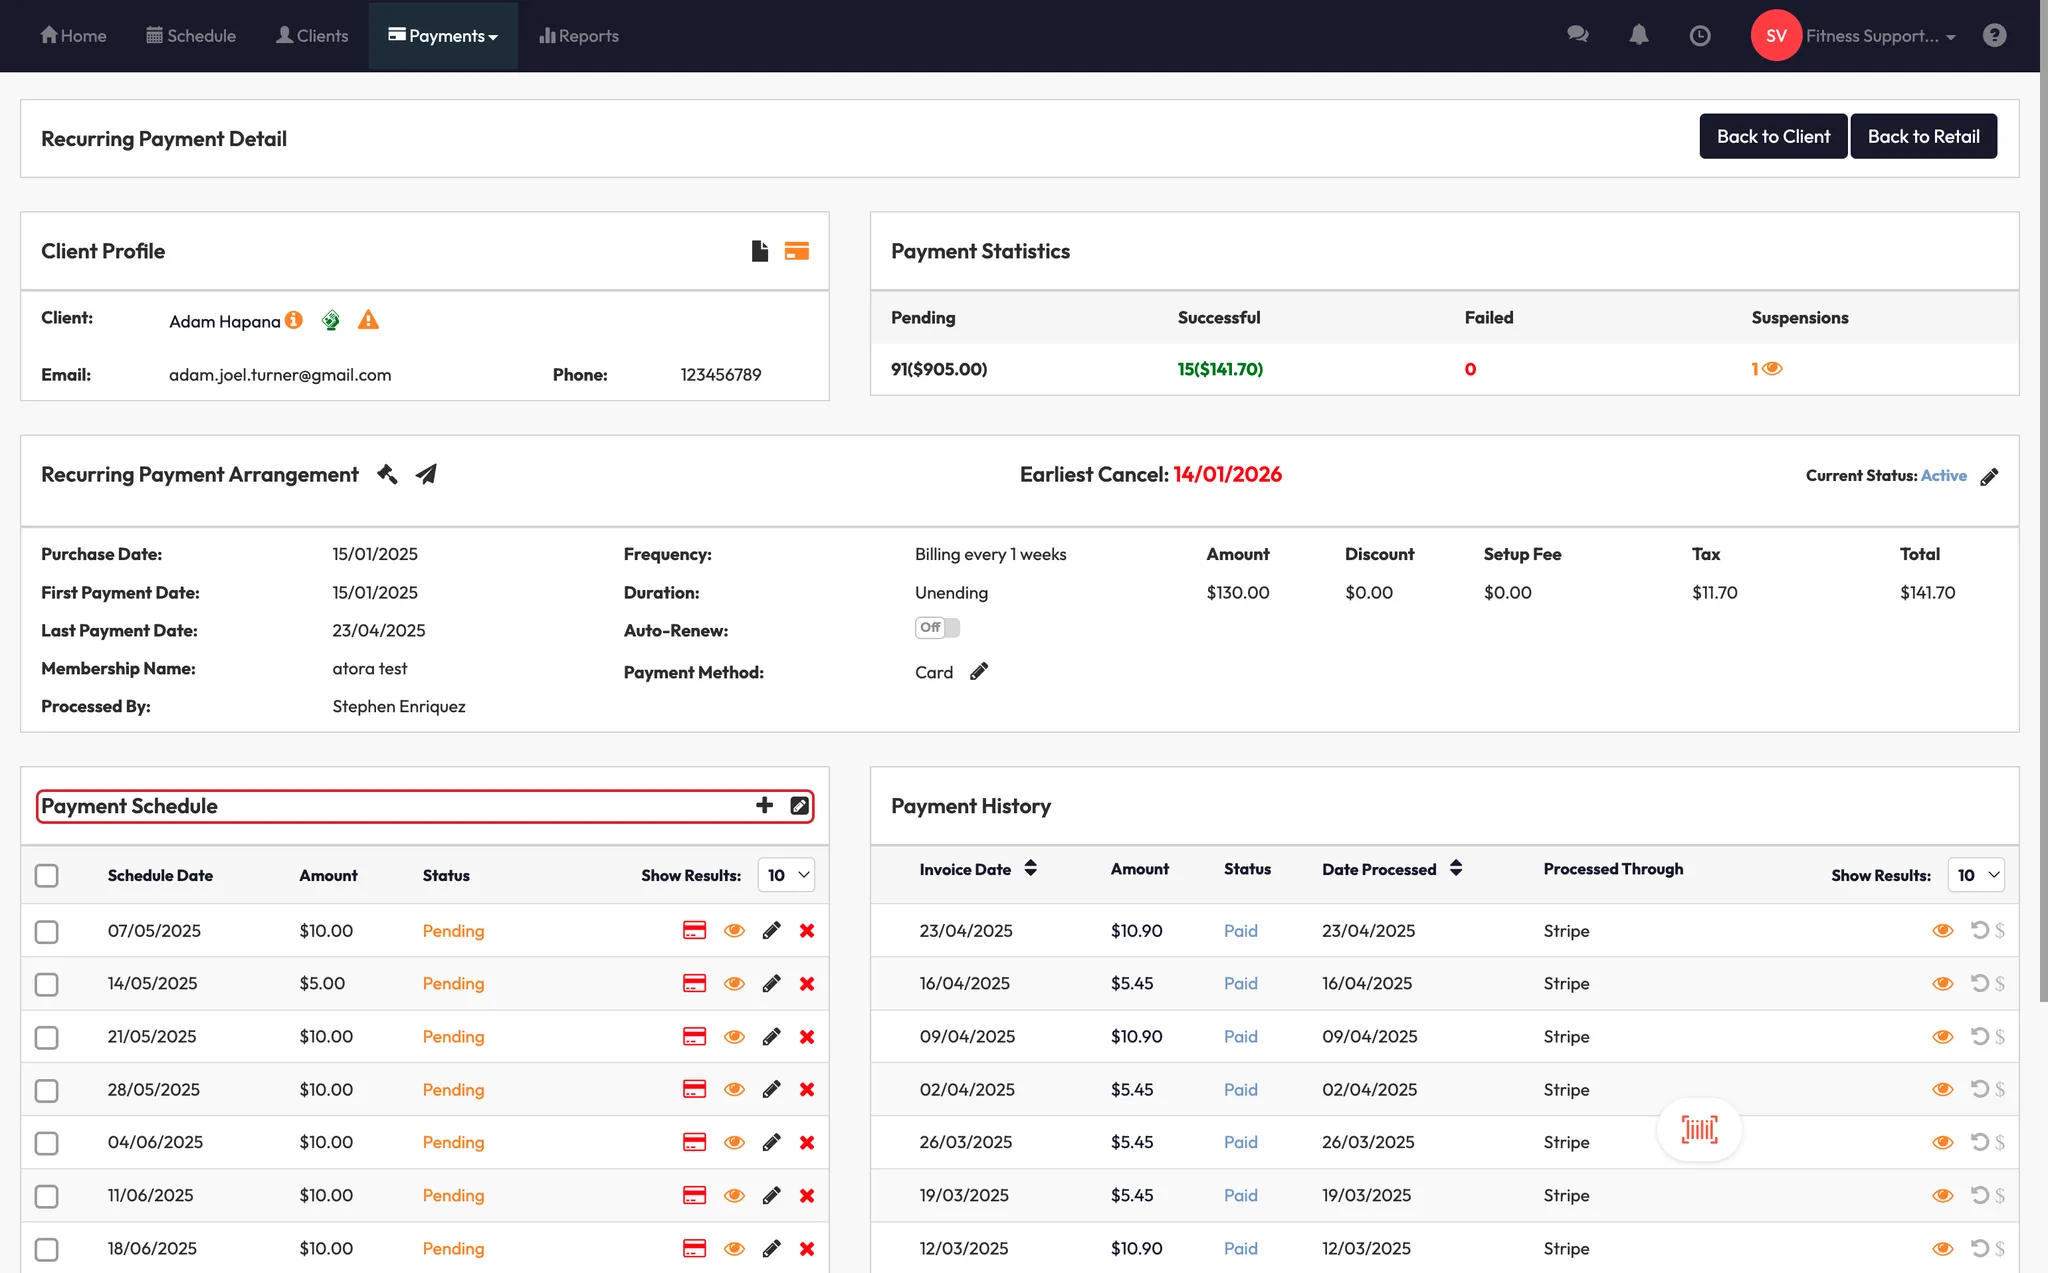
Step 17: Edit membership payments
- View payment history and future scheduled payments.
- Bulk edit payment dates or amounts.
- Refund payments (always to the original method!)
- Suspend, cancel, or add new payments as needed.


Expected Outcome
You’ll be able to confidently manage every part of a client’s record—billing, communication, history, and settings—within their Core profile.
Troubleshooting / FAQs
Q: What’s the difference between Removed and Deleted?
Removed clients stay in reports. Deleted clients are erased completely from the system.
Q: Can clients update their card details themselves?
Yes! They can do it through the app or the web portal anytime.
Q: Why won’t it let me delete a client?
Clear all outstanding sessions, payments, and memberships first. Then the delete option becomes available.
Still need help?
Reach out to our support team via [email protected]

