
 13
13
Overview
This article walks you through how to cancel a membership for a client in CORE. You can cancel a membership immediately or set it to cancel on a specific date. You’ll also learn how to add cancellation reasons for internal tracking.
🎥 Watch the walkthrough:
Or preview it below:
Prerequisites
- Admin access to CORE
- The client must have an active membership
- (Optional) Pre-defined cancellation reasons if needed for reporting
Step-by-step instructions
Step 1: Search for the client
- Click on the Clients tab.
- Use the search bar to find the relevant client (e.g. Linda).

Step 2: Access the membership section
- Once on the client’s profile, you’ll land on the Payments tab.
- Scroll down to the Memberships section.
- Locate the active membership and click the View (eye) icon.


Step 3: Cancel the membership
- In the membership view, click the Pencil (edit) icon.
- From the Status dropdown, change the status from Active to Cancelled.
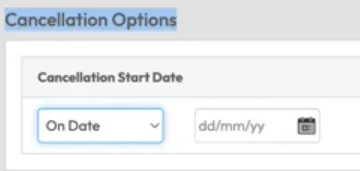
- Choose a Cancellation Option:
- Immediately: The cancellation takes effect right now.
- On a Specific Date: Set a future cancellation date.


Step 4: Add cancellation reasons (optional)
- Go back to the top of the screen and click Edit.
- Navigate to the Properties section.
- Click the + (plus) icon to add a new Cancellation Reason.
- Save changes once done.
Tip: Use cancellation reasons to help with retention analysis later.


Expected outcome
The client’s membership will be updated to reflect the selected cancellation date. If a reason is added, it will be recorded in their profile.
FAQs
Q: Can a client cancel their membership from the app?
A: Only if you’ve enabled the “Client Can Cancel Membership” setting in the membership setup.
Q: Will clients receive a notification when canceled?
A: Not by default. You’ll need to communicate changes separately.
Q: Can I undo a cancellation?
A: You can re-activate a membership if needed by editing the membership status.
Still need help?
Reach out to our support team via [email protected]

