
Overview
This guide covers how to add, configure, and sell Point of Sale (POS) inventory items in CORE — from setting up stock to tracking activity and processing sales. Ideal for studios selling in-person items like water bottles, socks, protein bars, and yoga mats.
🎥 Watch the walkthrough:
Or preview it below:
Prerequisites
- Admin access to CORE
- At least one location enabled for POS
- Product list and categories defined
Step-by-step instructions
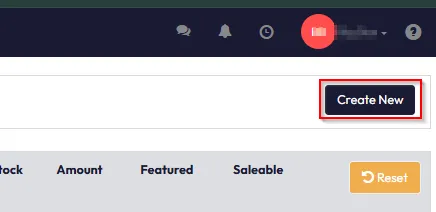
Step 1: Access POS Inventory
- Navigate to Payments > Retail Configurations > POS Inventory.

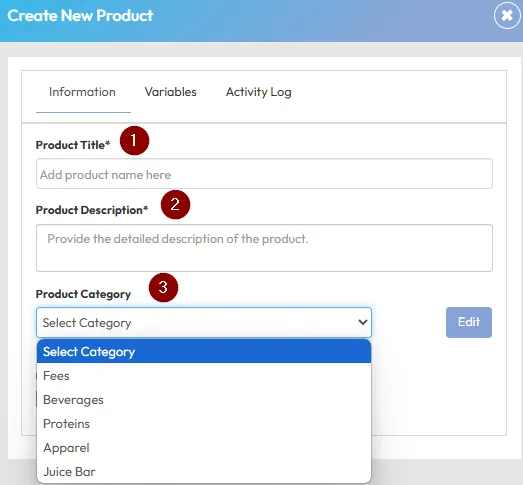
Step 2: Add a new product
- Click Create New.
- Fill in the Product Title (e.g. Socks).
- Add a Description.
- Choose a Product Category (e.g. Clothing, Equipment, Merchandise).
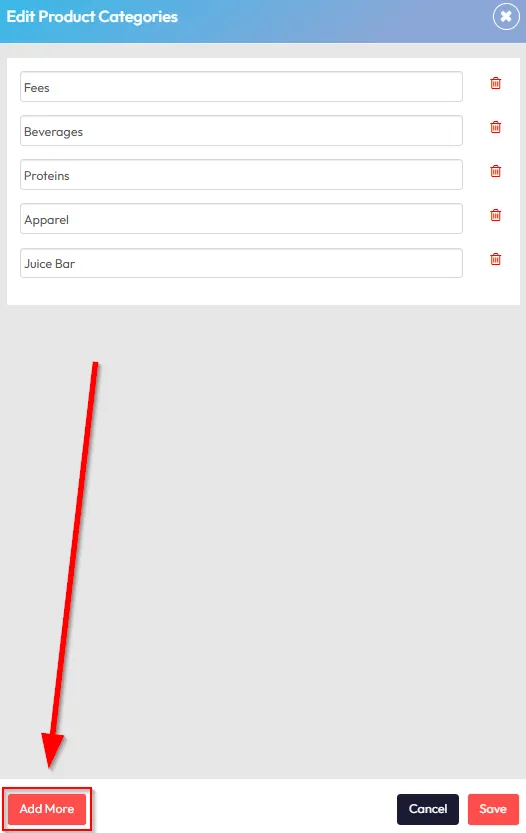
- (Optional) Click Edit > Add More to create a new category.
- Upload a product image (optional).

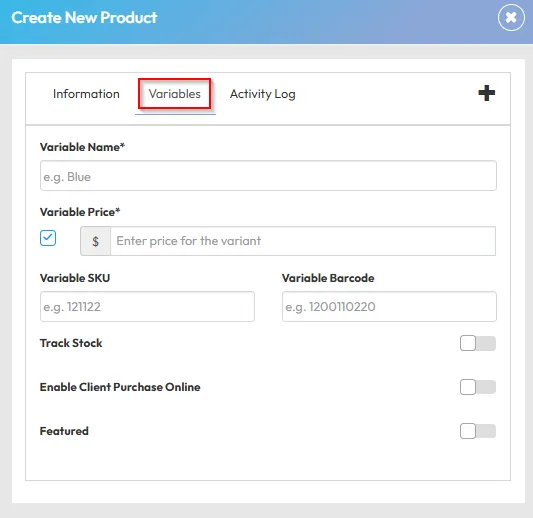
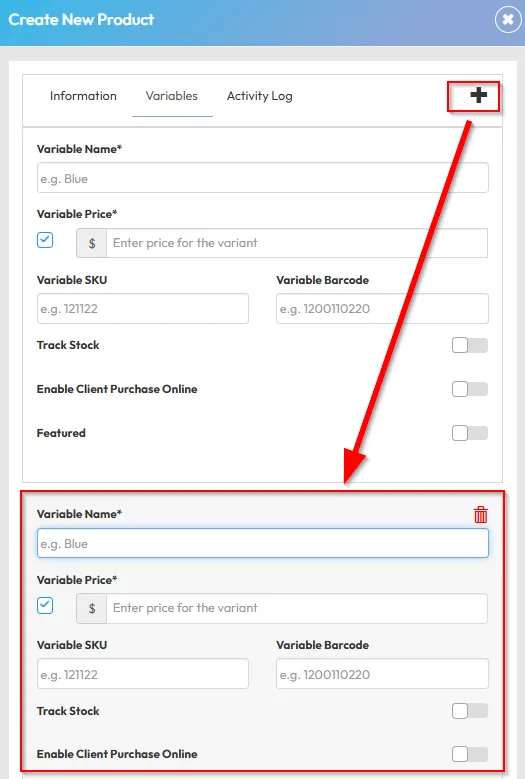
Step 3: Add variables (e.g. size, color)
- Enter a Variable Name (e.g. Blue).
- Set the Price and Tax Settings.
- Add a SKU or Barcode if using a scanner.
- Enable Track Stock if you want to manage inventory levels.
- Toggle Enable Client Purchase Online if you want the product to be available online.
- Toggle Featured to pin the item to the top of the POS list.
Tip: You can add multiple variables (e.g. Red, Large, etc.) with different pricing and stock settings.
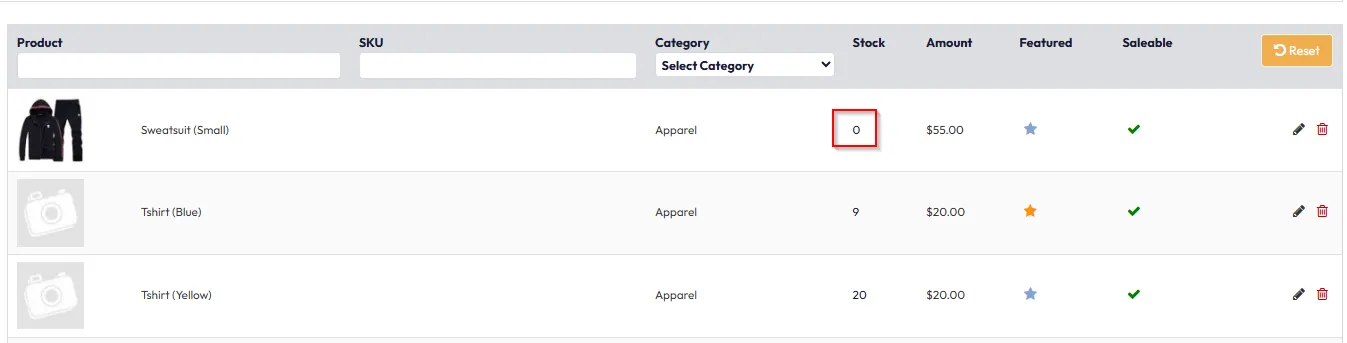
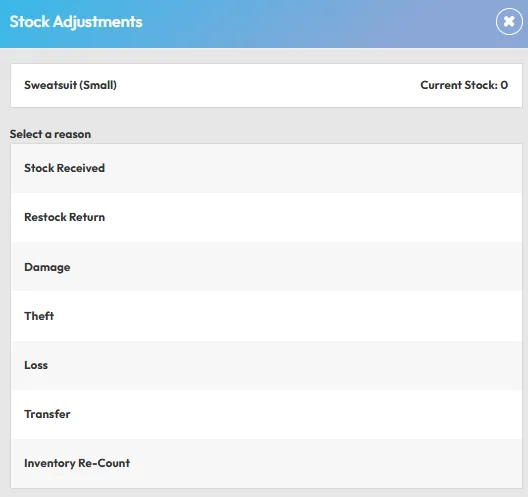
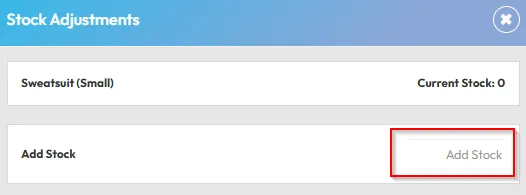
Step 4: Add stock
- After saving the item, click the zero quantity beside a variable.
- Choose a Stock Action (e.g. Stock Received).
- Enter the quantity and reason.
- Click Save.
Tip: Do this for each variable (e.g. Blue Socks = 20, Red Socks = 10).
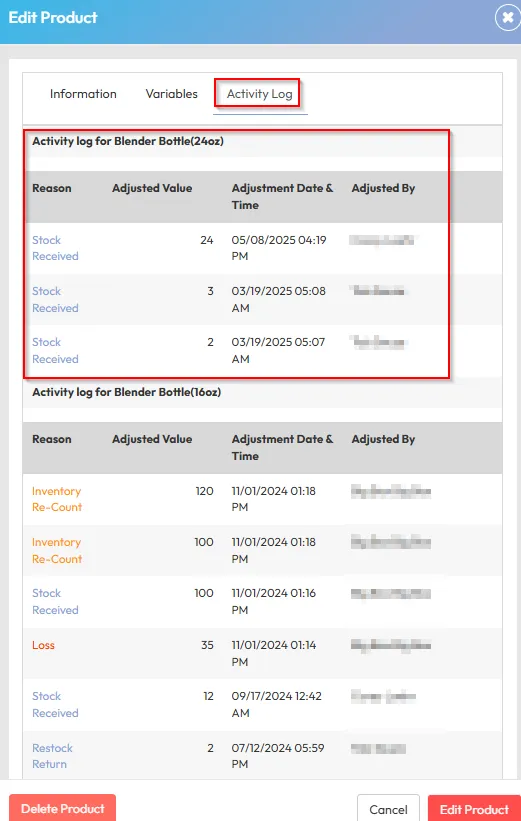
Step 5: View stock activity
- Click Edit on any product and open the Activity Log.
- You’ll see stock movement history, including dates, actions, and quantities.

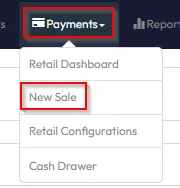
Step 6: Process a sale (from Payments tab)
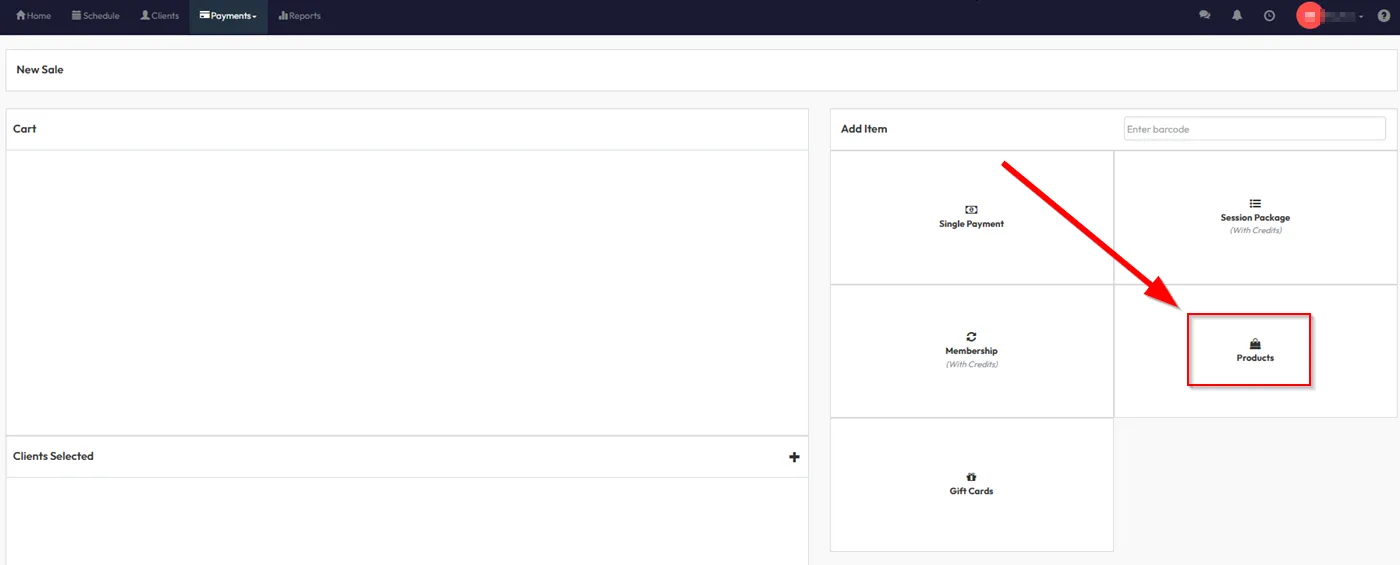
- Go to Payments > New Sale.
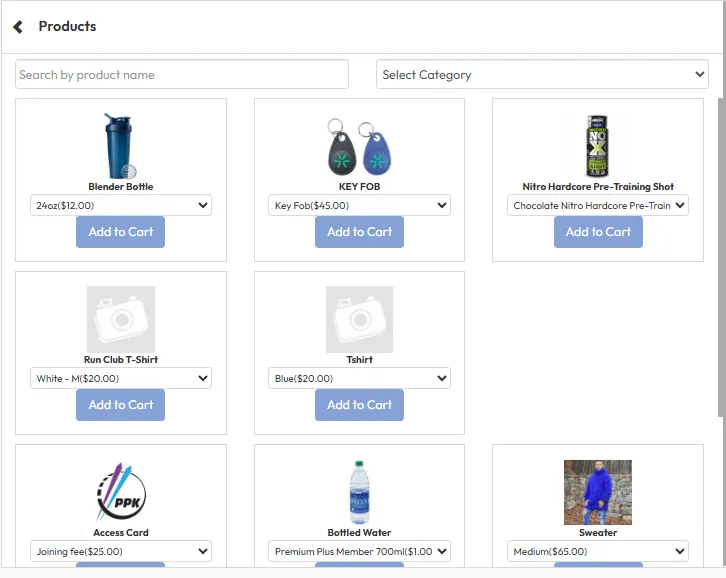
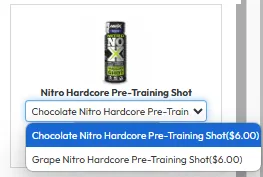
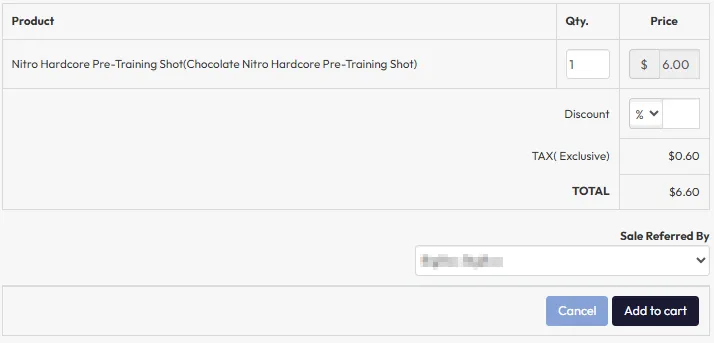
- Under Product, select the item from the list (featured items appear at the top).
- Use the dropdown to select the correct variable.
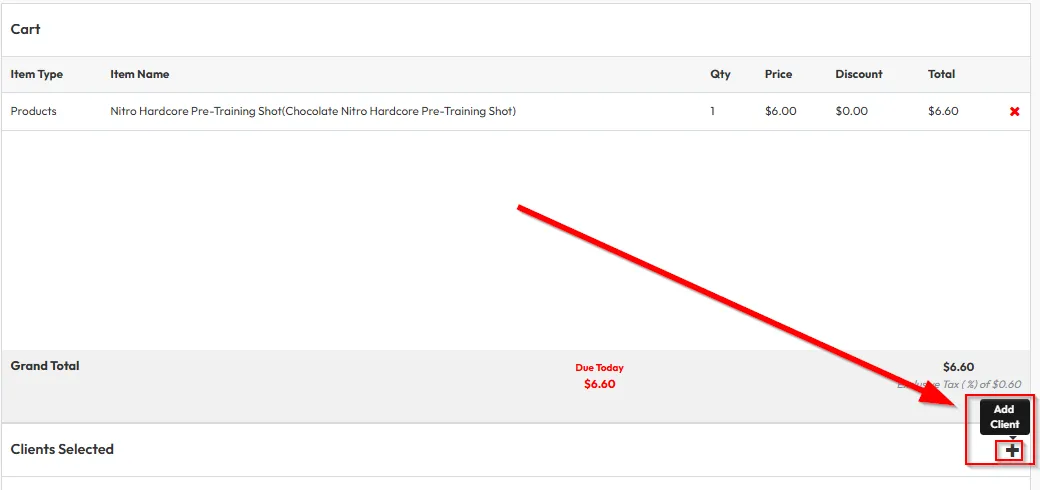
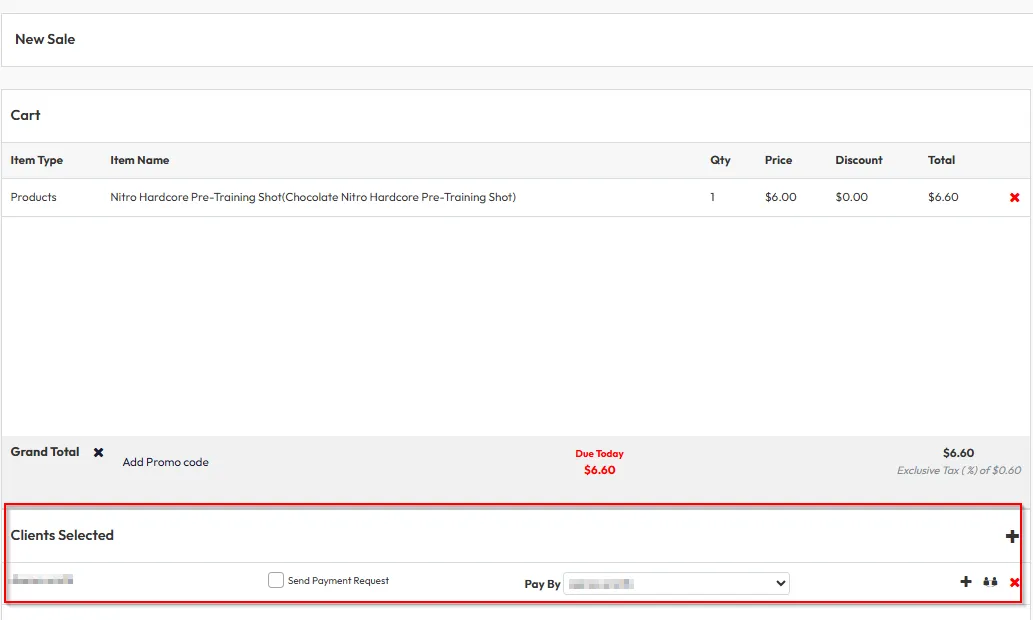
- Add to cart and proceed to Checkout.
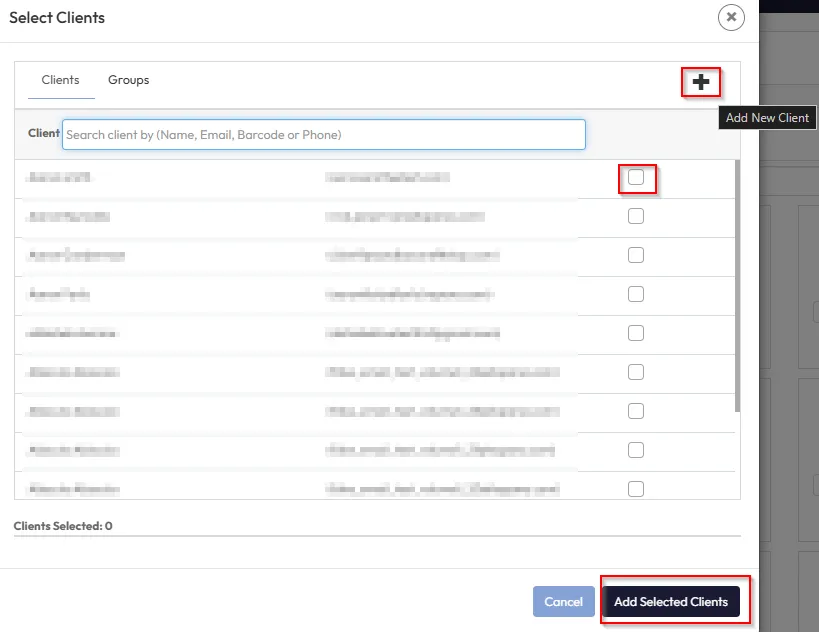
- Choose the client and confirm sale.
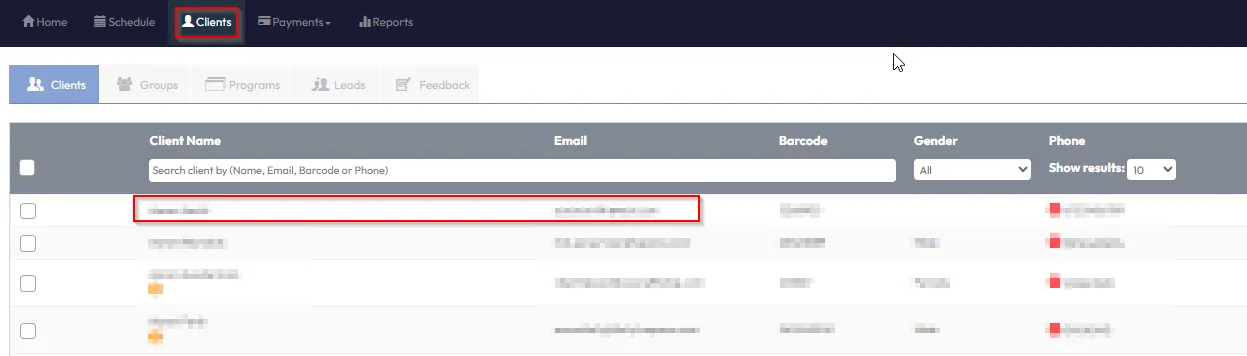
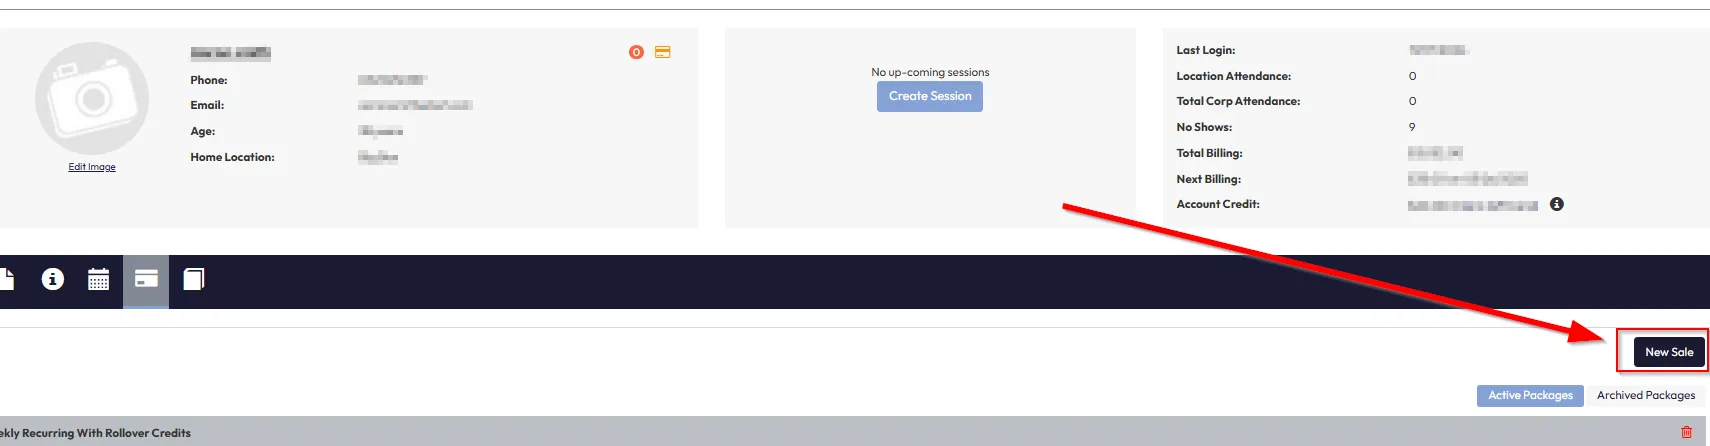
Step 7: Process a sale (from Client Profile)
- Navigate to Clients and open a client profile.
- Click New Sale.
- The client is pre-selected — choose the product, add to cart, and check out.
Tip: This is a faster method when selling directly to a known member.
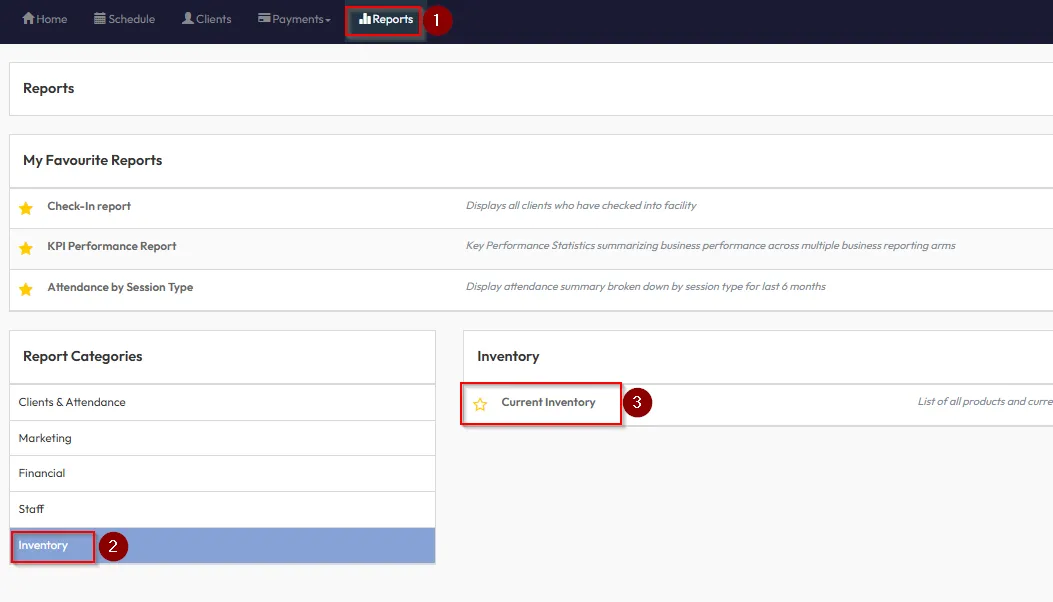
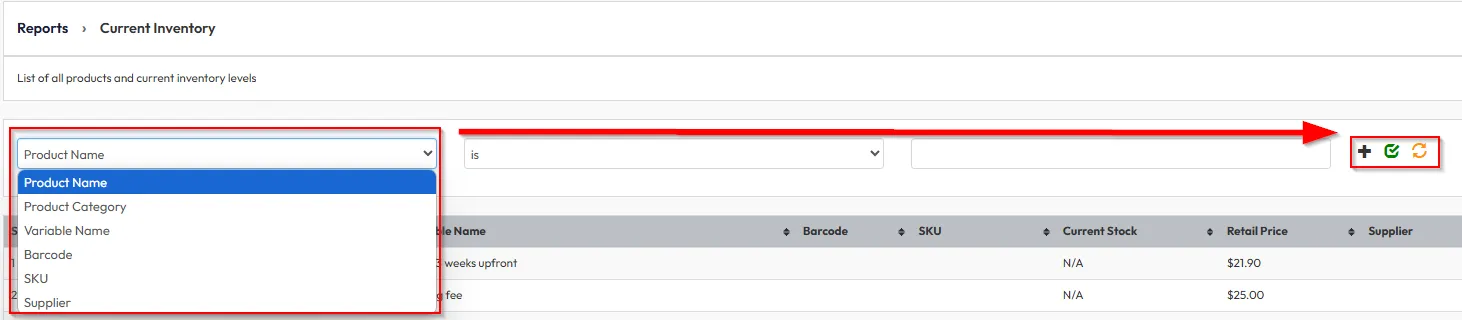
Step 8: View inventory reports
- Go to Reports > Inventory > Current Inventory.
- View and filter by:
- Product name
- Category
- Supplier
- Stock levels
- Retail pricing
- SKU and barcode
Tip: These filters make it easy to track inventory at scale.
Expected outcome
You’ll be able to sell products via the POS, track stock levels, view transaction history, and report on inventory usage across your studio locations.
FAQs
Q: Can I sell products online as well?
A: Yes, if you toggle Enable Client Purchase Online during product setup.
Q: What happens if stock hits zero?
A: The system will reflect “Out of Stock” and prevent sales if Track Stock is enabled.
Q: Can I feature multiple product variations?
A: No — only one variation of a product can be featured at a time.
Still need help?
Reach out to our support team via support@hapana.com