
 1082
1082
Overview
Schedule templates let you define the structure for each class or session on your timetable — think names, times, instructors, credit types, and more. Once set up, you can use these templates to quickly add sessions to your calendar with consistent info and rules.
🎥 Watch the walkthrough:
Or preview it below:
Prerequisites
Before you begin:
- Know your class name, session type, and duration
- Have rooms and locations set up (if applicable)
- Decide on credits, payment, and attendance settings
Step-by-step instructions
Step 1: Access schedule templates
- Go to your Schedule
- Click the cogwheel icon
- Select Schedule Templates


Step 2: Edit or delete an existing template
-
Click the edit icon to update an existing template
→ You can update just the template, or apply changes to all future sessions using that template
-
Click the delete icon to permanently remove the template
Tip: Deleting a template means it can’t be scheduled again


Step 3: Create a new schedule template
- Click the plus icon to start a new template
- Add a session name (e.g. Boxing)
- Select a session type from your existing list
- Click Edit if you need to manage session types or colours
- Colours will appear in your calendar to identify session types

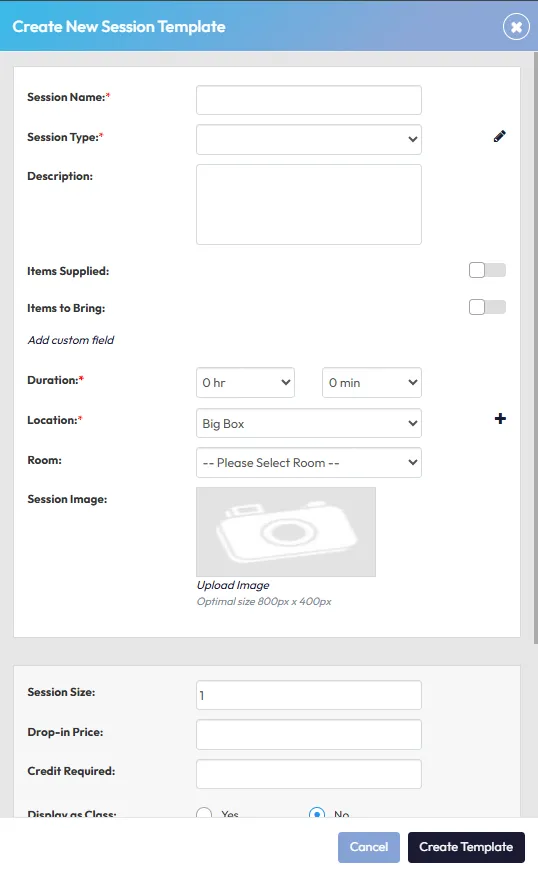


Step 4: Configure the session details
- Description: Add class info for clients
- Items supplied/to bring: e.g. gloves, mats
- Custom fields: Add any extra details (optional)
- Duration: Set start and end times (e.g. 1 hr or 1 hr 30 min)
- Location and room: Choose where the session will take place
- Image: Optional — appears in the client app
- Session size: How many people can book in
- Credit required: e.g. 1 credit per booking
- Drop-in price: Set a casual rate (optional)
Tip: If you don’t want drop-ins, leave the price blank and require members to purchase a membership or package.


Step 5: Configure advanced settings
- Multi-location access: Allow this class to be bookable across multiple sites
- Private session request: Toggle on for request-only bookings (e.g. PT sessions)
- Payment required: Must pay or have a credit before booking
- Waitlist: Enable and set a waitlist cap (e.g. 5 people)
- Session feedback: Enable if you want to collect feedback after the session
- Two-party attendance confirmation: Optional for private sessions requiring member verification


Step 6: Assign instructors
- After creating the template, click Edit
- Select which instructors can run the class
- You can limit it to one staff member or allow all instructors
- Click Save


Expected outcome
You’ll create a reusable schedule template that makes it quick and easy to add consistent sessions to your calendar — complete with instructors, room info, booking rules, and credit settings.
FAQs
Q: Can I edit a schedule template without affecting existing sessions?
A: Yes — when editing, choose to update just the template or apply changes to all future sessions.
Q: What happens if I delete a template?
A: It won’t delete scheduled classes, but you won’t be able to add new ones with that template.
Q: Can I use the same session type across multiple templates?
A: Yes — just make sure each template has a unique name and setup.
Still need help?
Reach out to our support team via [email protected]

