
 513
513
Overview
Need to bring on a new trainer, update an existing profile, or remove someone from your team list? CORE makes team management simple. With pre-configured Team Access Groups, adding new team members is quick, and editing or archiving profiles is just as easy.
This guide shows how to add, edit, remove, and reactivate team members — all from one central place.
🎥 Watch the walkthrough:
Or preview it below:
Prerequisites
Before you begin:
- You must have access to Team Settings
- Recommended: Set up Team Access Groups in advance to streamline setup
- Have the team member’s basic details ready: name, email, role, and optional bio info
Step-by-step instructions
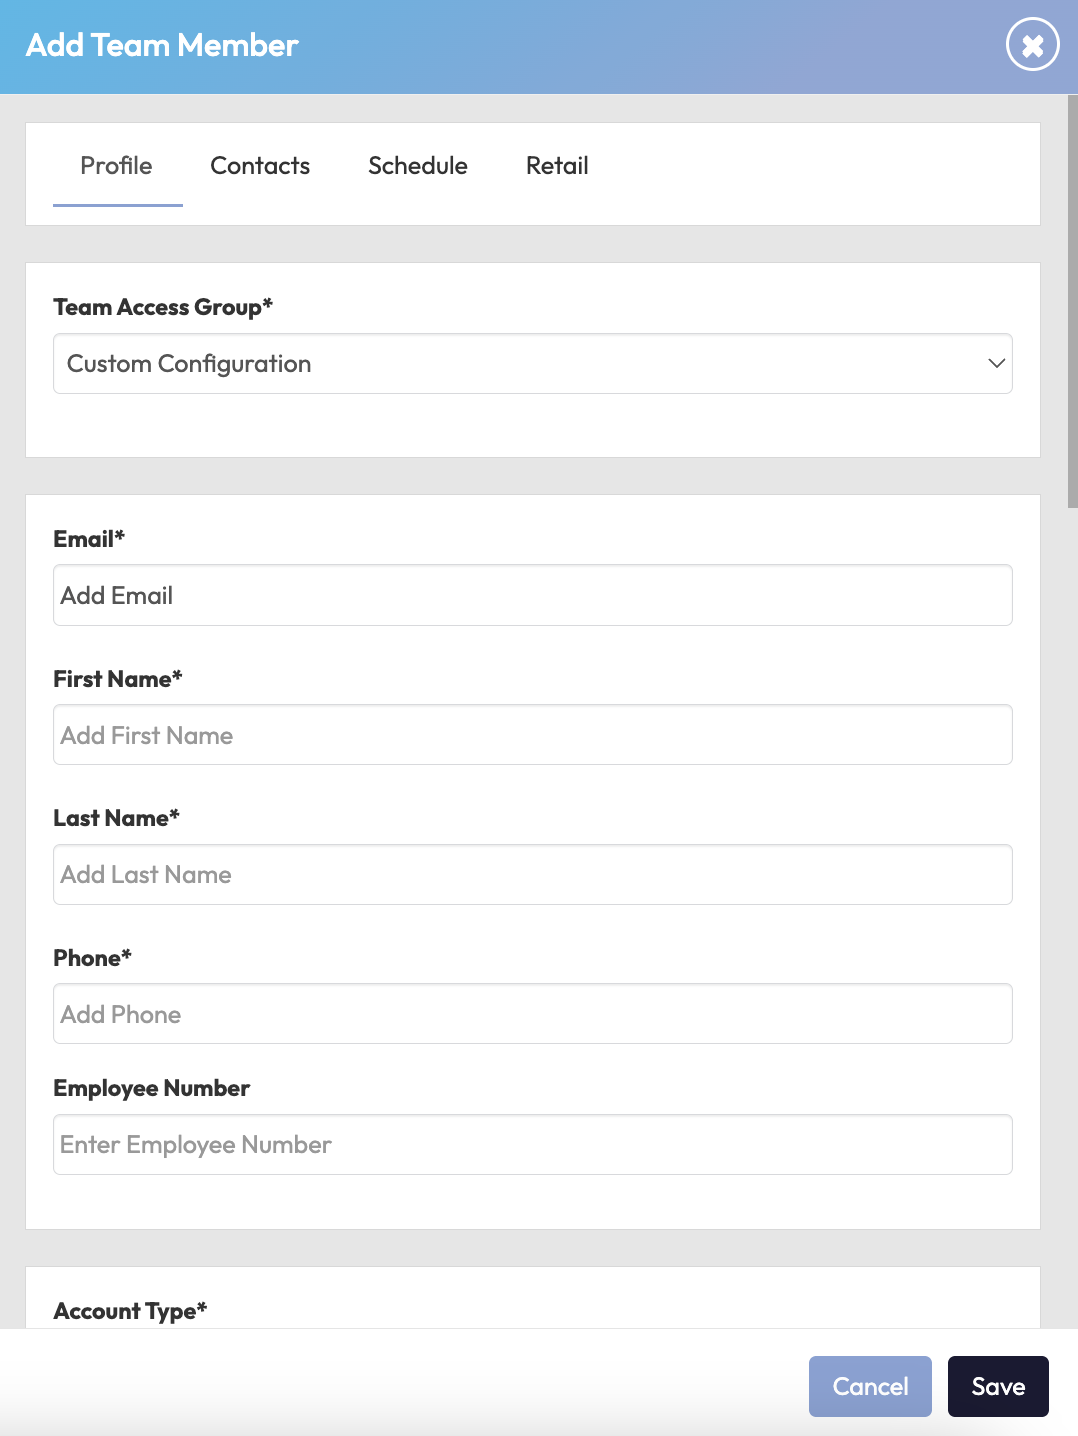
Step 1: Add a new team member
-
Click your Location Name at the top
-
Select Team Settings
-
Click the + icon to add a new team member
-
Under Team Access Group, choose the appropriate group (e.g. Trainers and Coaches)
Tip: Pre-configuring access groups makes this step faster and consistent
-
Fill in the following:
- Email address
- First name & Last name
- Phone number
- (Optional) Employee Number - this allows you to record a payroll-specific employee identifier against each team member. This number appears in the Employee Number column in the Team Access list and in the Payroll report.
- (Optional) Payroll ID
- (Optional) Profile image, hobbies, Instagram handle — these appear in the app/web when clients view their trainer
- Password
-
Click Save


Step 2: Edit a team member profile
- In the Team Settings list, find the team member you want to edit
- Click the pencil icon ✏️
- Update any fields as needed (email, image, bio, phone, etc.)
- Click Save
✅ Tip: This is great for updating branding info like profile pictures or bios after onboarding.


Step 3: Remove or archive a team member
- Find the team member in Team Settings
- Click to open their profile
- Select Archive and confirm
⚠️ Archived team members no longer appear in the team list or schedule, but their data is saved in case they return.


Step 4: Reactivate an archived team member
- In Team Settings, click the bin icon to Show Archived
- Find the archived team member (e.g. Fred)
- Click the pencil icon ✏️
- Click Activate
- The team member will be restored to the active list


Expected Outcome
You’ll be able to easily manage your team’s profiles, maintain accurate contact and payroll info, and personalize their public presence in the app — while archiving and restoring accounts as needed.
FAQs
Q: Can I reuse an email address for a returning team member?
A: Yes, if the account was archived, you can reactivate it and retain the original email.
Q: Will archived members show up in class scheduling?
A: No, only active team members will appear when assigning instructors to a class.
Q: What if I forgot to assign an access group?
A: You can always edit the team member’s profile and assign the correct group later.
Reach out to our support team via [email protected] if you need help.

