
 1185
1185
Overview
Running a class comes with a few admin tasks — swapping out instructors, signing in clients, and charging no-shows when needed. This guide walks you through how to make those quick changes and ensure your attendance and fees are all handled in one place.
🎥 Watch the walkthrough:
Or preview it below:
Prerequisites
Before you begin:
- Make sure your schedule is active and staff are set up
- Know which class session you need to adjust
- Ensure no-show fees are configured under Retail Settings
Step-by-step instructions
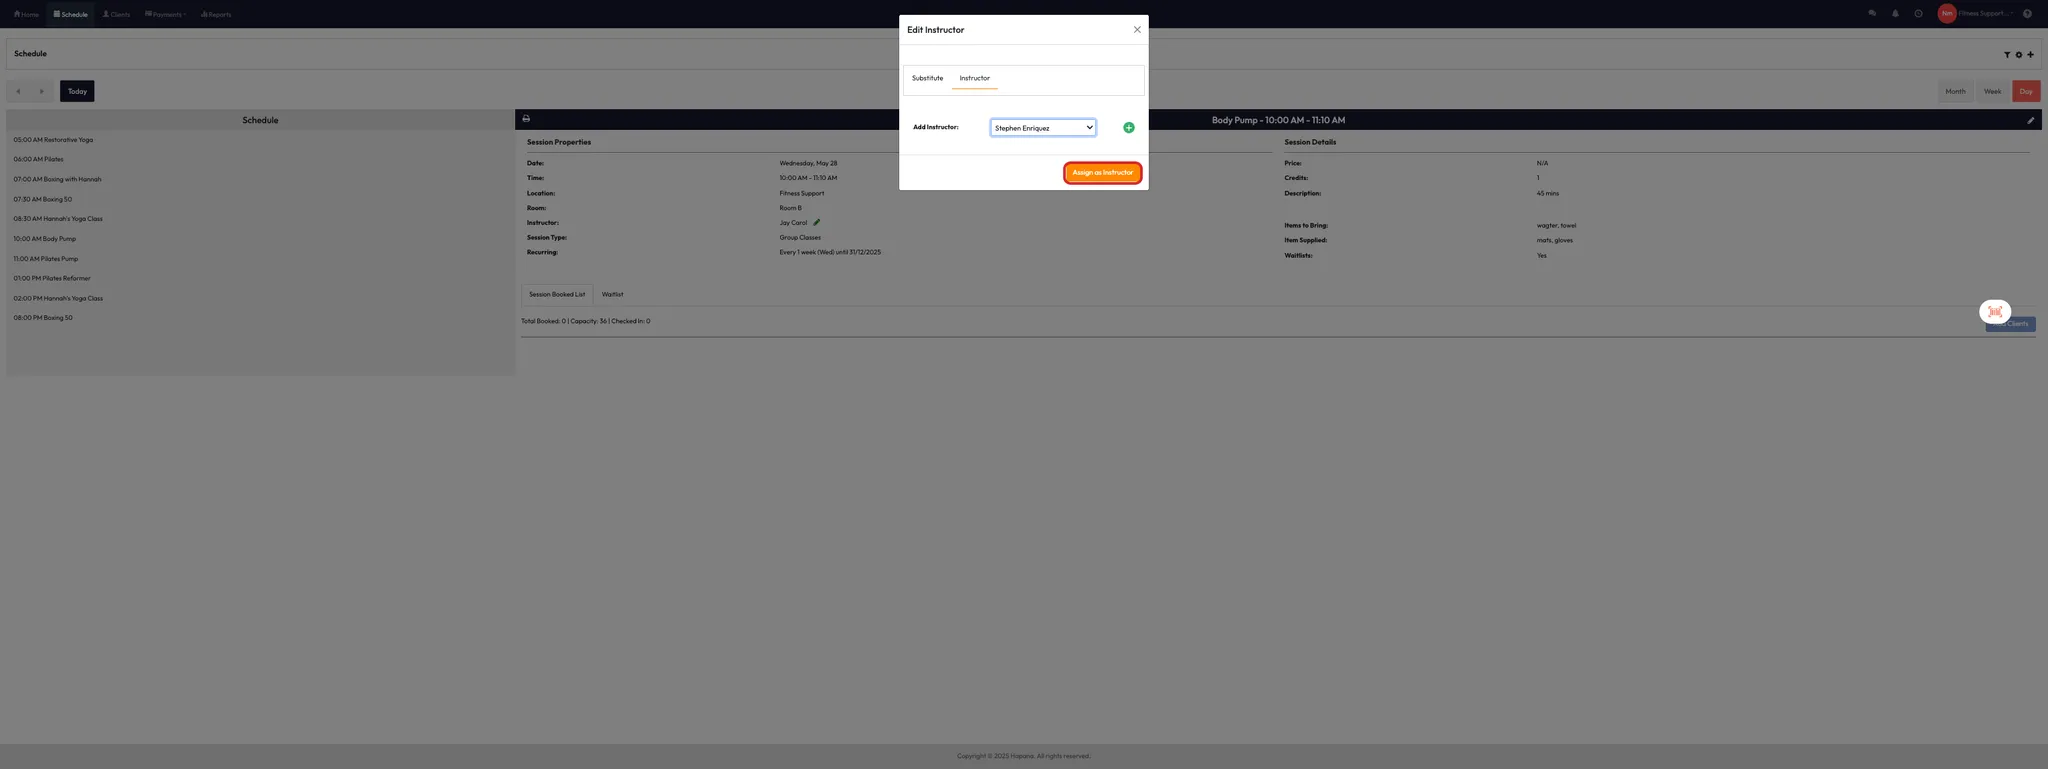
Step 1: Change the instructor for a class
- Go to your Schedule and select a session
- Scroll to the Instructor field
- Click the pencil icon to open instructor details
- Select Instructor heading
- Select the new instructor from drop down menu
- Click Assign as Instructor
Tip: Editing from the main class screen without choosing “Edit only this session” may show the instructor as a "Sub." Always use the edit button to assign them properly.


Step 2: Sign clients into a class
- Open the class from your Schedule
- Use the buttons next to each client:
- Attend to mark them present
- Late Cancel if they cancel within your cancellation window
- Cancel to remove them from the session
Tip: Use the Confirm attendance button for faster check-in when the class starts.

Step 3: Charge a no-show fee
- Wait until the class is finished — the no-show fee icon (💲) appears next to the bin icon
- Click the 💲 icon next to a client who missed the class
- If the client has card details saved, click Pay securely to process the fee
Tip: This only applies to clients who weren’t marked as attended or cancelled.


Step 4: Set up your no-show fee (if not already set)
- Go to Payments > Retail Configurations
- Scroll down and select Retail Settings on left hand side
- Scroll to Schedule Fees
- Click the pencil icon next to Charge No Show Fee
- Enter the fee amount (e.g. $10)
- Click Save


Expected outcome
You’ll be able to update instructors, check clients in, and apply a no-show fee — all from the session screen. Once configured, charging a no-show is just a couple of clicks.
FAQs
Q: Why does the instructor show as “Sub”?
A: If you edit the instructor from the main class screen (without clicking “Edit only this session”), it appears as a sub. Always use the pencil icon.
Q: When does the no-show icon appear?
A: Only after the class has finished — and only for clients who weren’t marked as attended or cancelled.
Q: What if there are no card details saved?
A: You won’t be able to charge the fee unless payment details are saved in the client’s profile.
Still need help?
Reach out to our support team via [email protected]

