380
380
Overview
This guide will outline how to create custom fields in GROW to help you create surveys, automations, forms and workflows.
Distinction between Custom Fields and Custom Values
Custom Fields are datapoints associated with a contact while Custom Values are data points linked to a specific location.
How to Set Up Custom Fields
- Login to your GROW account
- Click into Settings
- Scroll to Other Settings > Custom Fields
- Click the green '+ Add Field' button
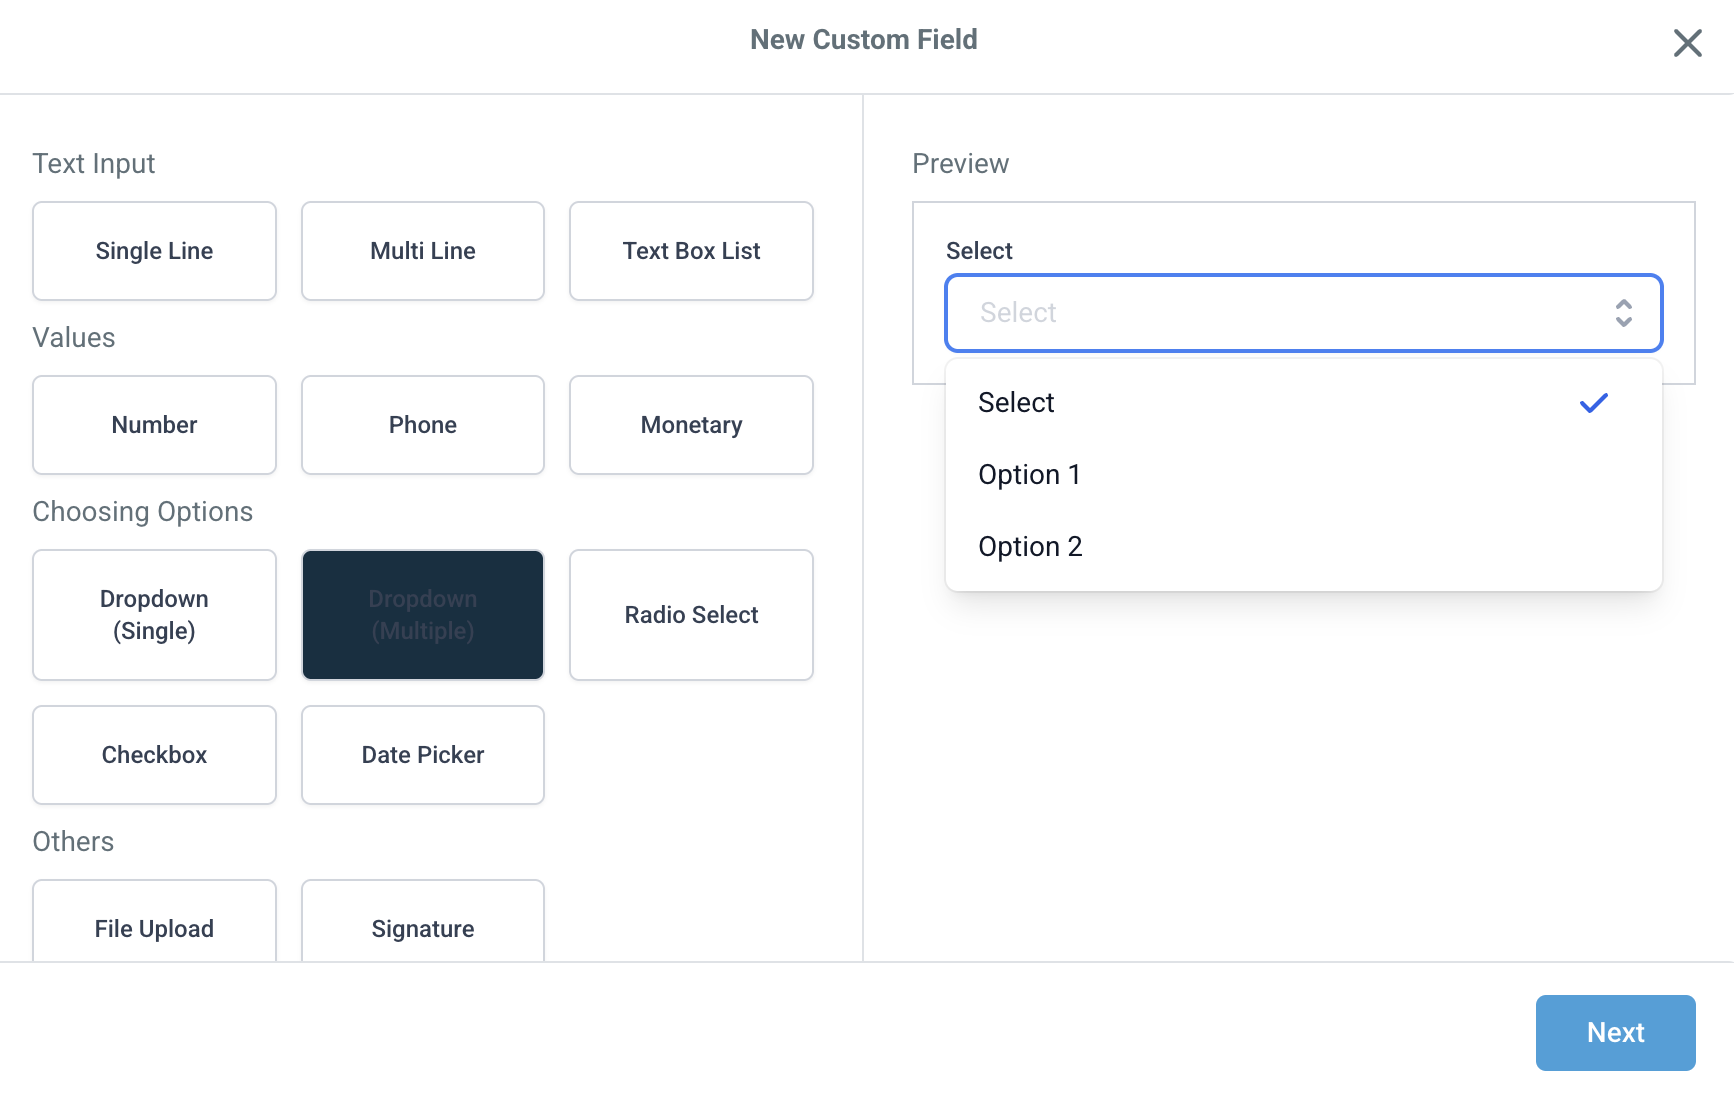
- Choose between:
- Text Input (Single Line, Multi Line, Text Box List)
- Values (Number - can be used to gather numeric responses. Phone - can be used to gather referral's phone numbers. Monetary - can be used to gather monetary responses.)
- Choosing Options (Dropdown (Single), Dropdown (Multiple), Radio Select (single selection), Checkbox (can check more than 1 item), Data Picker)
- Others (File Upload - can be used to upload pictures, Signature)
Tip: Preview what the field will look like on the right hand side
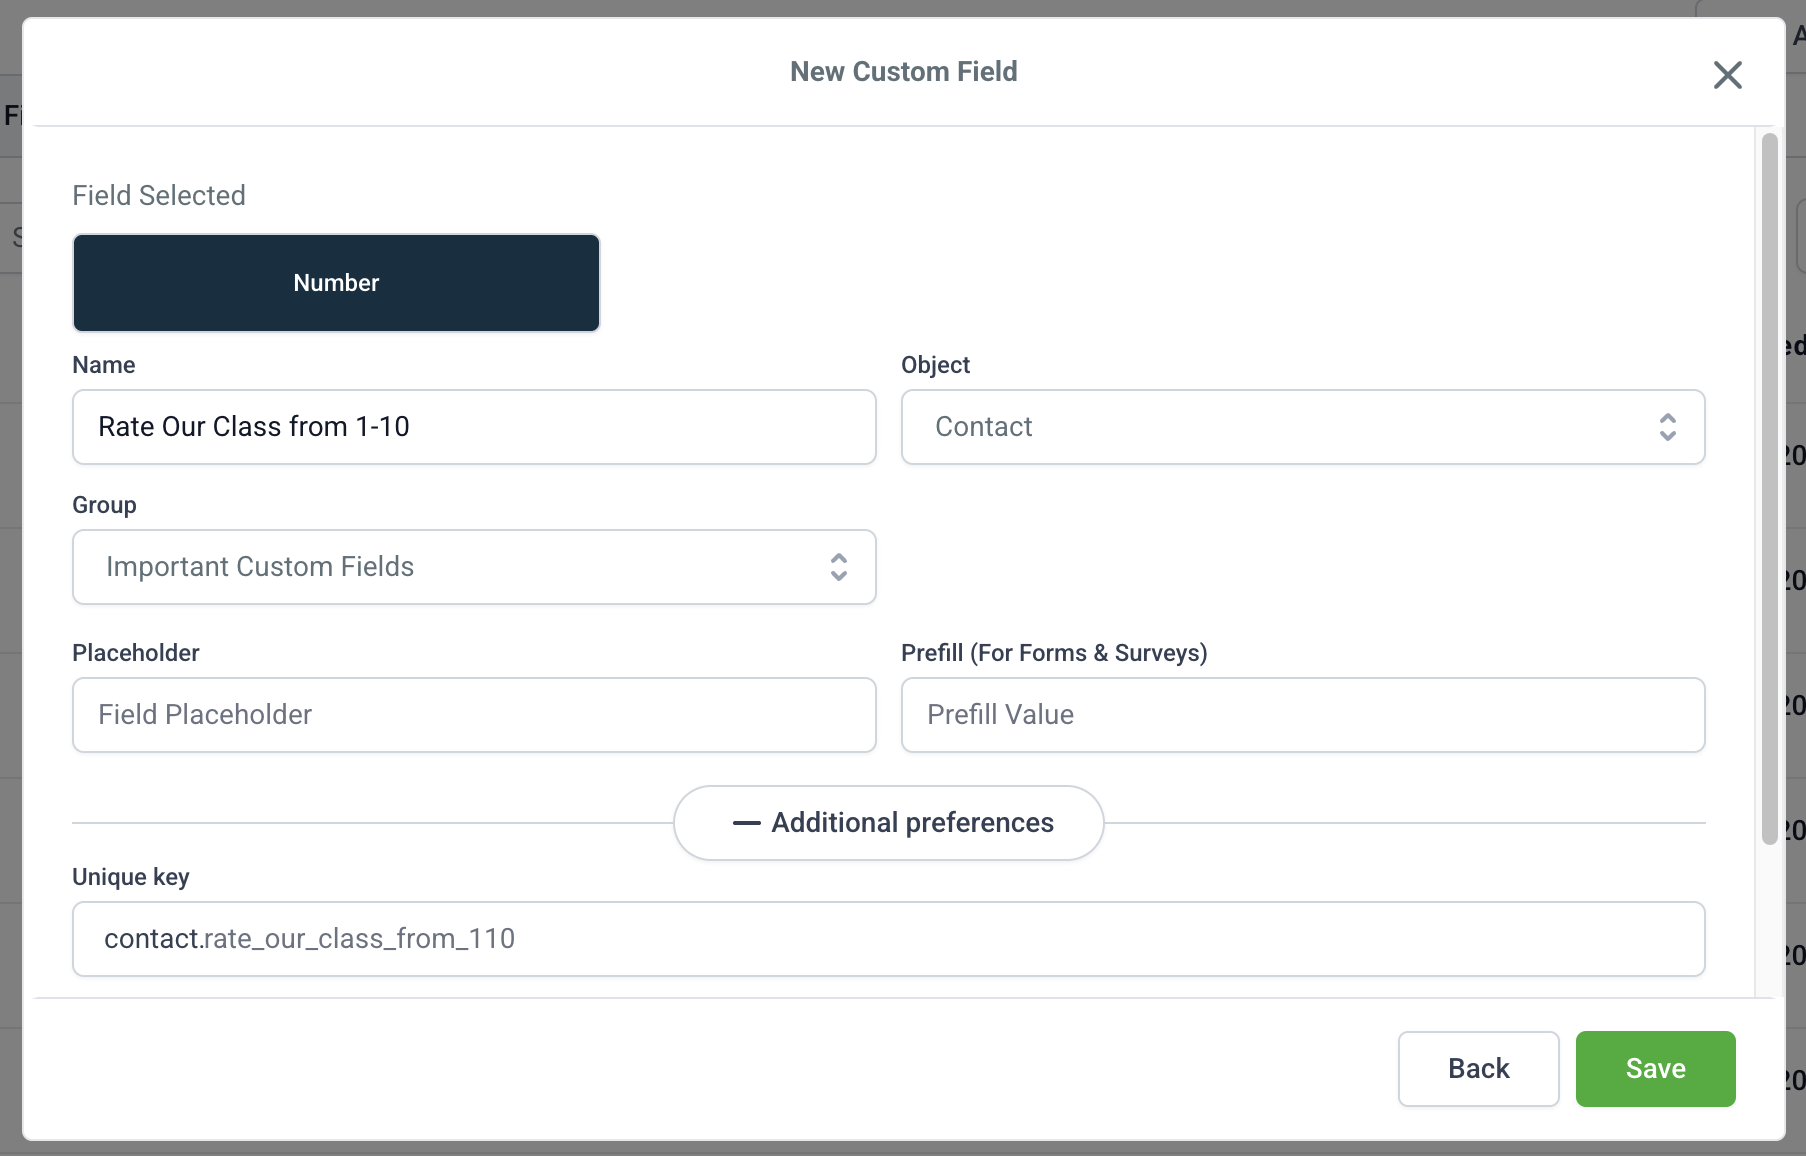
6. Enter in the Field Name (this can be used to enter the question)
7. Select the Object between: Contact, Opportunity and Company. It is recommended in majority of cases to choose Contact.
8. Select which Group (folder) you wish to add the field to
9. Enter in the Field Placeholder which appears inside the form field when it's empty
10. Enter in PreFill (For Forms & Surveys)
11. Click Save
How to Create Folders
Custom Fields can be categorised into Folders to help with organisation. To create a new folder, follow the steps below:
- Login to your GROW account
- Click into Settings
- Scroll to Other Settings > Custom Fields
- Click the 'Add Folder' button
- Enter the Folder Name and hit Save
How to Use the Custom Fields
Custom Fields can be used to gather information about Contacts or Opportunities through Workflows, Surveys, Forms and Automations.
How to use the custom fields in Forms
- Navigate to Sites
- Click into the Forms tab
- Select relevant form from the list
- Always include the Email field to ensure that the form is associated with a contact
- Click into Custom Fields tab
- Find the relevant folder and drag & drop the Custom field across onto the form
- Click Save at the top right
Tip: Click Preview to see what the form will look like
How to use the custom fields in Surveys
- Navigate to Sites
- Click into the Surveys tab
- Click + Add Survey button
- Always include the Email field to ensure that the survey is associated with a contact
- Click into Custom Fields tab
- Find the relevant folder and drag & drop the Custom field across onto the survey
- Click Save at the top right
Tip: Click Preview to see what the survey will look like
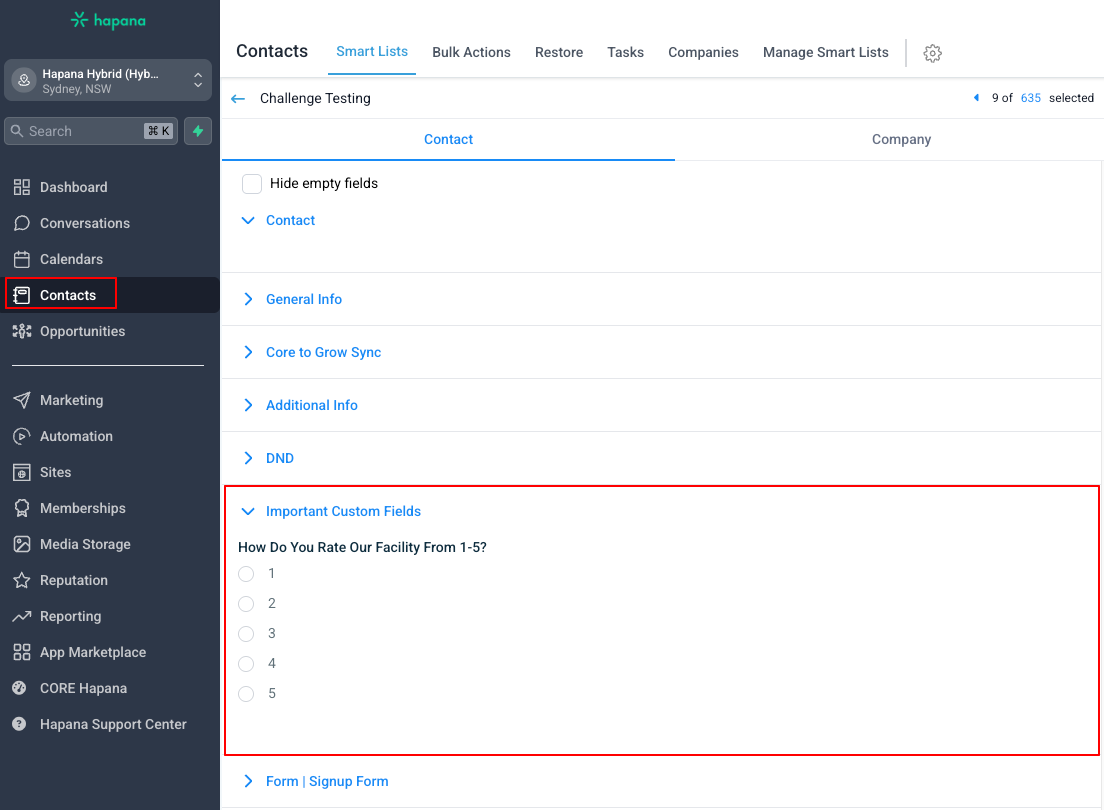
To view the Custom Fields responses in a Contacts profile, go to Contacts > Select Relevant Contact > Click Relevant Folder > The Custom Field is visible within the folder.
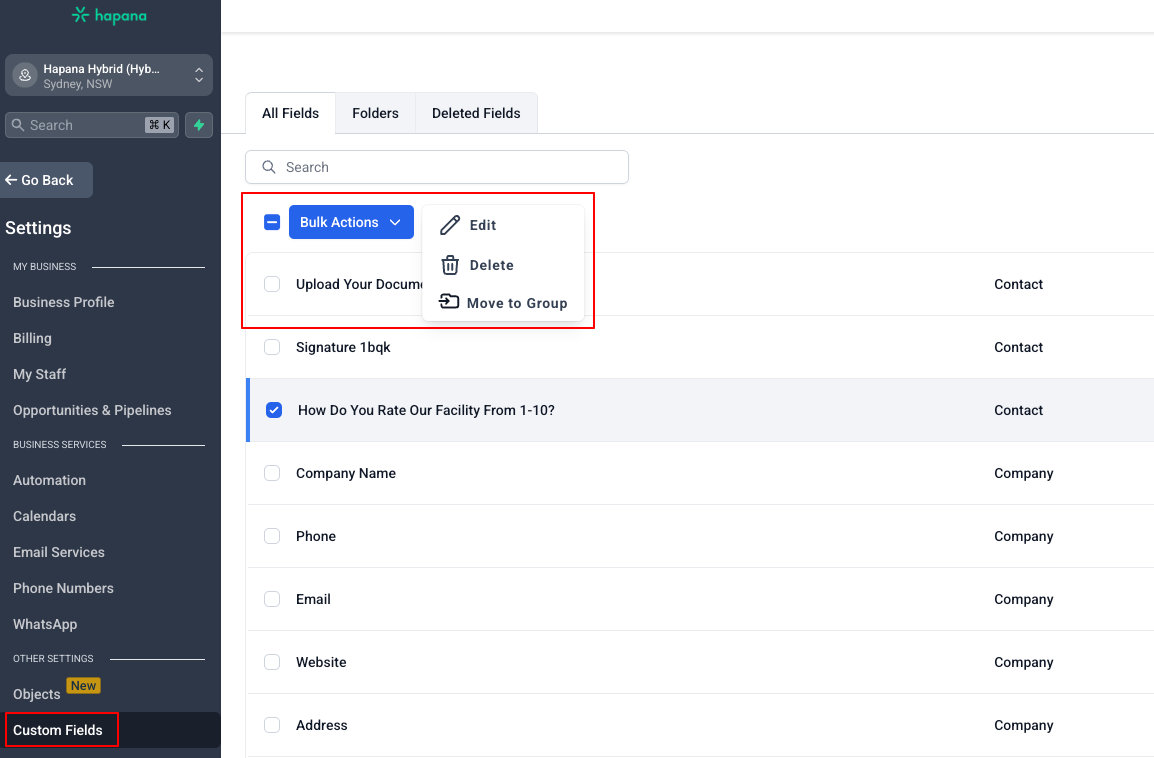
How to Edit or Delete a Custom Field
- Go to Settings > Custom Fields
- Select the checkbox beside the relevant field you wish to Edit or Delete
- Click Bulk Actions and select either Edit or Delete from the dropdown menu
Please note: Deleted Fields can be viewed within Settings > Custom Fields > Deleted Fields