
 471
471
Overview
This article shows you how to configure the Waitlist Promotion Method so you can choose how clients are promoted from the waitlist when a spot opens up.
You’ll learn how to set whether clients are promoted automatically or given a set amount of time to confirm - this will help you manage class attendance efficiently while giving clients flexibility.
Please note:
The Automatically Confirm Waitlist Clients setting has been renamed to Waitlist Promotion Method for better clarity.
The setting options have also been updated:
-
"Yes" is now called "Automatic Confirmation"
-
"No" is now called "Confirmation Window"
Your existing settings will stay exactly the same after this update:
-
If your setting was "Yes," it will continue as Automatic Confirmation
-
If your setting was "No," it will continue as Confirmation Window (with a default 2 hour confirmation window)
Prerequisites
-
Access to Core > Account Settings > Configuration.
-
Permission to update waitlist settings for your business.
How to Configure the Waitlist Promotion Method
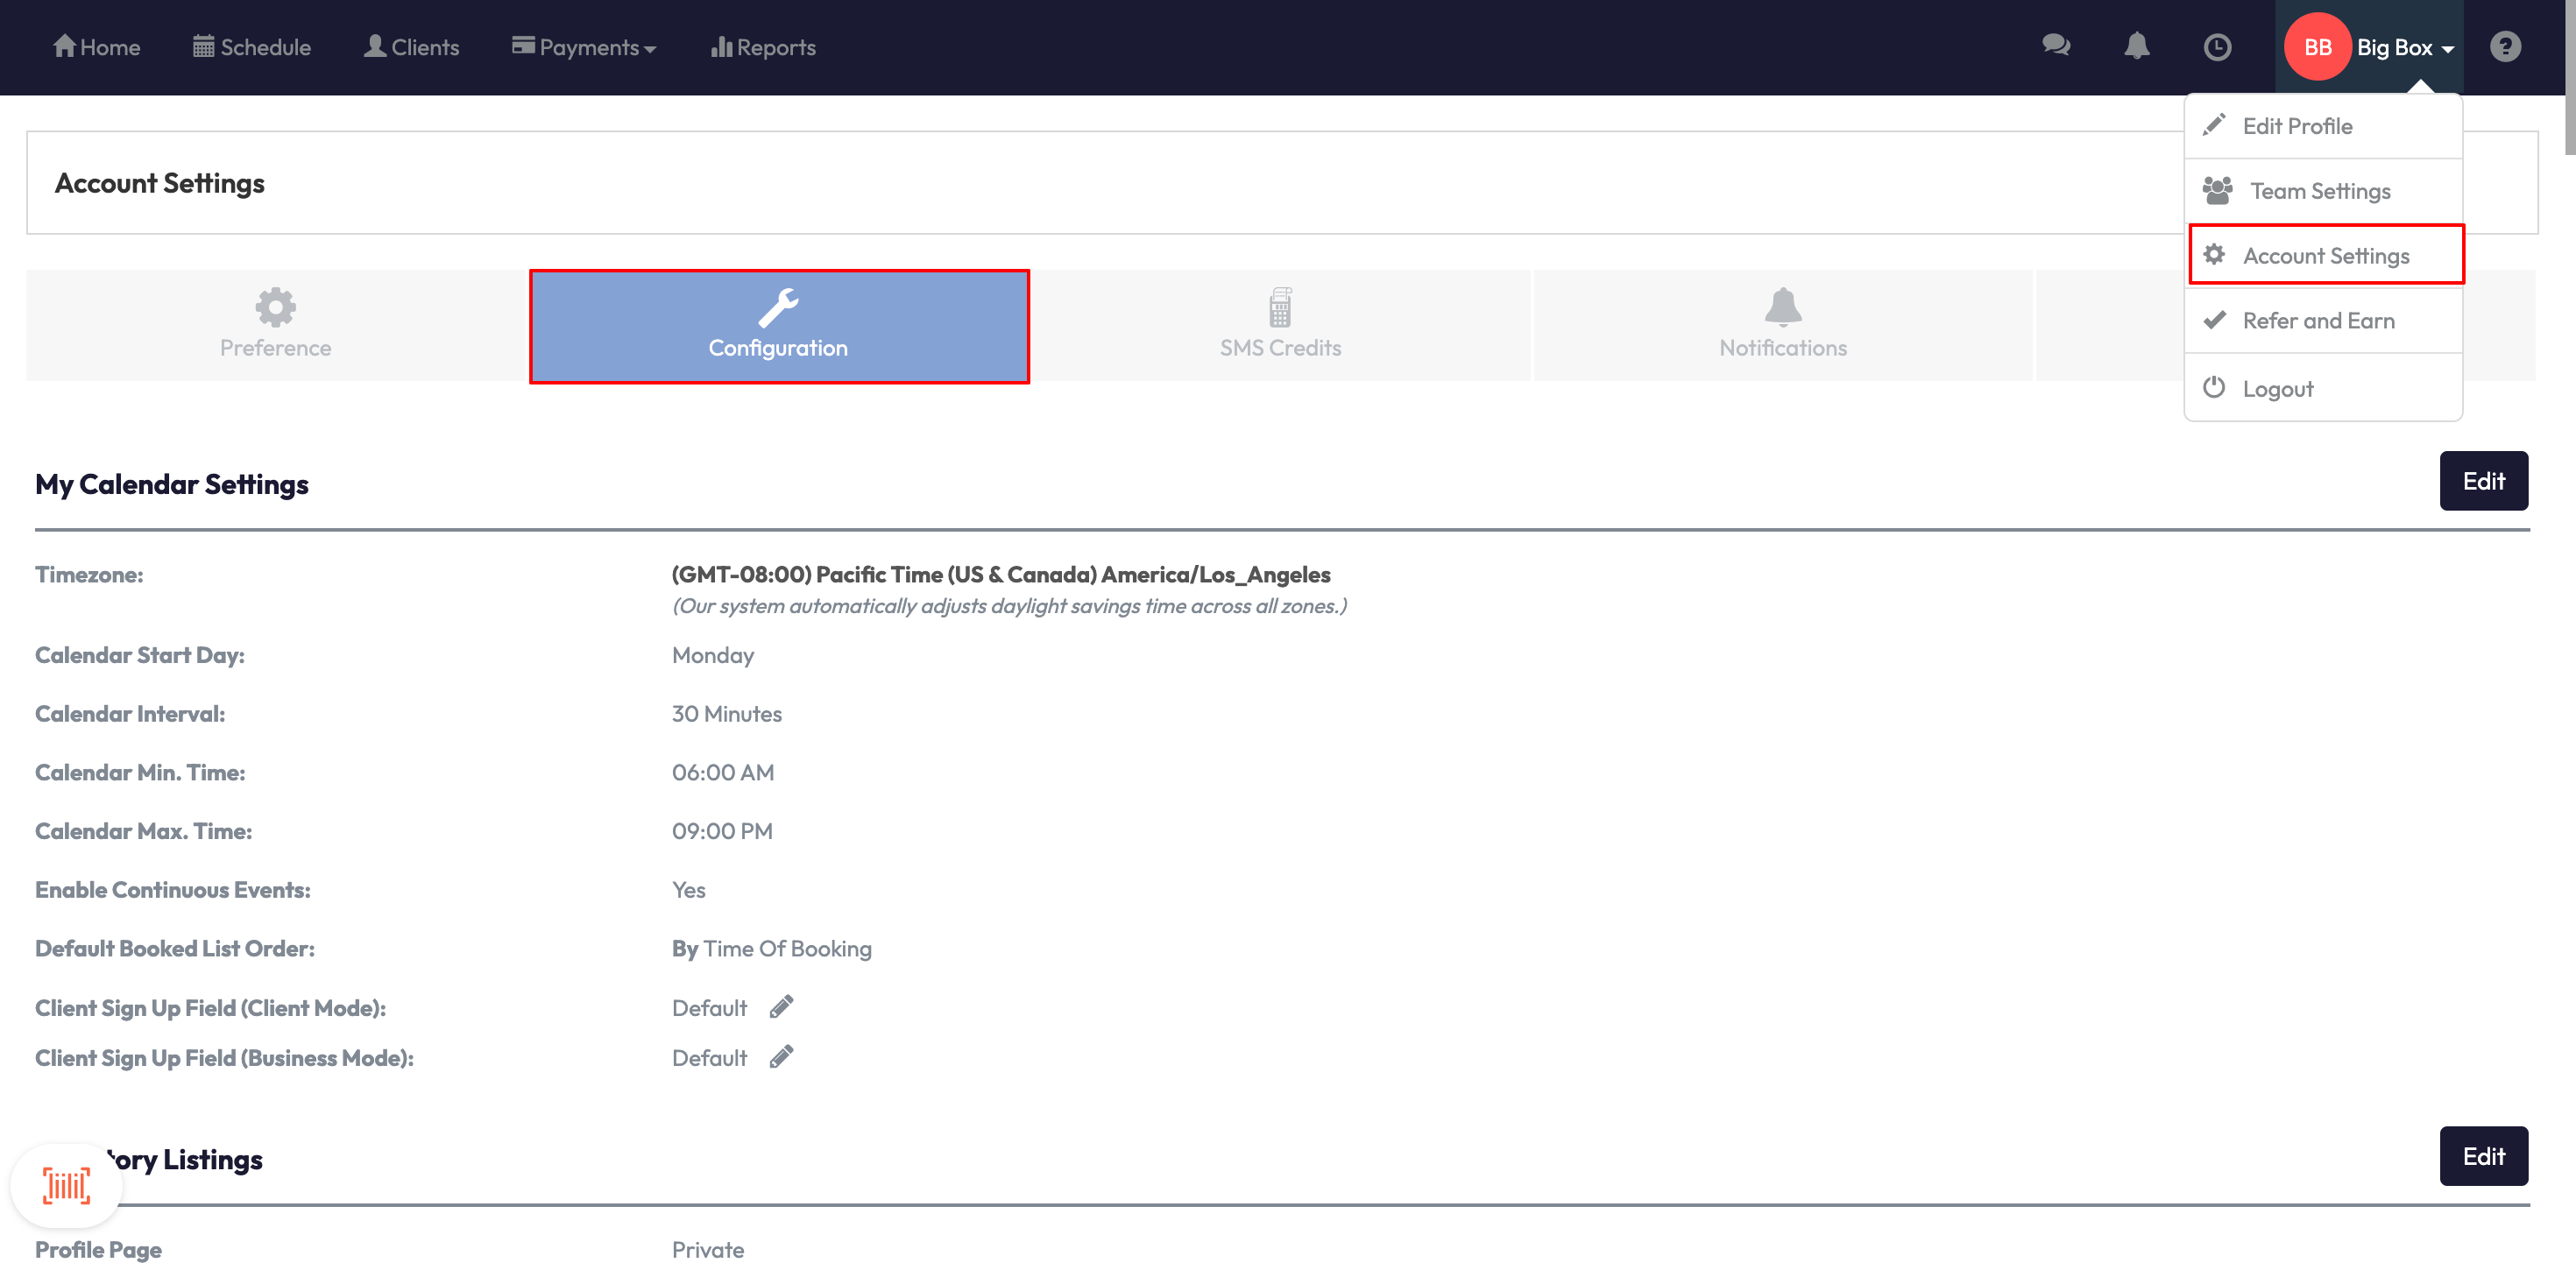
Go to Account Settings
-
Log in to your Core account.
-
Click on Account Settings.
-
Select Configuration from the menu.
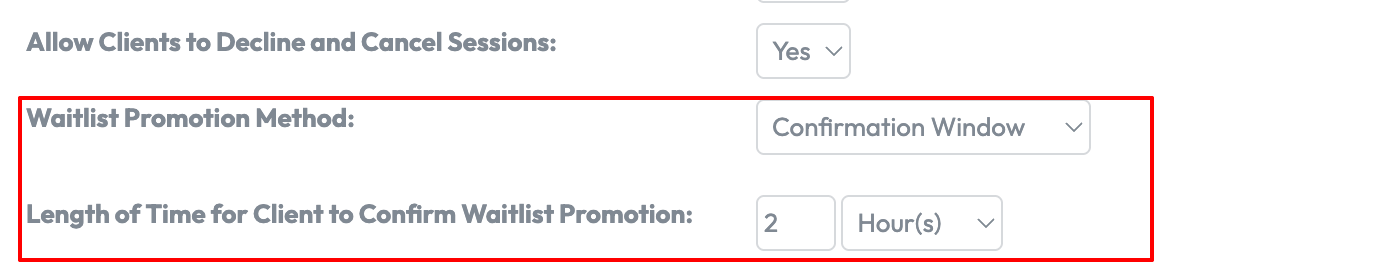
Find Waitlist Promotion Method
-
Scroll to Business Profile > Click Edit
-
Find the section for Waitlist Promotion Method
-
You’ll see two options:
-
Automatic Confirmation: Clients are auto-promoted as soon as a spot opens.
-
Confirmation Window: Clients have a set time to confirm before the next client is offered the spot.
-

Set your preferred method
-
Choose either Automatic Confirmation or Confirmation Window based on your preference.
Tip: Automatic Confirmation means that clients don’t need to take action as they are added right away.
If using Confirmation Window, configure time limit
-
If you choose Confirmation Window, a new field appears:
Length of Time for Client to Confirm Waitlist Promotion. -
Enter a number (e.g., 2) and select Minutes or Hours from the dropdown.
-
When done, click Save.
Please note: The default is 2 hours but you can adjust it as needed.
Expected Outcome
Once saved, your waitlist promotion behavior will reflect your selected method.
Clients will either be auto-promoted or given the time window you specified to confirm their spot.
FAQs
Q: What happens if a client doesn’t confirm in time?
A: The system will remove them from the waitlist and offer the spot to the next client automatically.
Q: Can I change the time window later?
A: Yes! You can return to this setting anytime and update the duration.
Q: Will this change affect current waitlist promotions?
A: No, it only applies from when you save your changes going forward.
Need a hand?
Reach out to our support team via [email protected].

