
Overview
Membership prices change and when they do, you want those changes reflected in Hapana quickly and accurately. This article walks you through two things:
- Updating the price of a single membership directly in your core account.
- Bulk updating membership prices and discounts for multiple clients at once using the Membership Subscription Price Update tool. This is a huge time-saver when a price change affects lots of members. Access to the Membership Subscription Price Update tool must first be enabled.
Prerequisites
Before you start, make sure you have:
- Access to your core account in Hapana (you'll need to be logged in for both workflows).
- A spreadsheet tool such as Excel or Google Sheets to edit the bulk update template.
- The new prices and discounts you want to apply, ready to go.
Part 1: Update the Price of a Single Membership
This step allows you to update the membership price for future sales.
-
Log in to your core account on Hapana.
-
Open Retail Configurations > click Payments in the main menu
-
Select Retail Configurations
-
Select Memberships from the left-hand side menu
-
Use the search bar to find the membership you'd like to change.
-
Click the Edit icon on the right to edit the membership.
-
Scroll down to the Price field and enter the new membership price.
- Click Edit package to save.
Part 2: Bulk Update Client Membership Prices
If a price change affects many clients, the Membership Subscription Price Update tool lets you update everyone in one go instead of editing memberships one by one.
Access to the Membership Subscription Price Update tool must first be enabled.Step 1: Enable Access to the Membership Subscription Price Update tool
-
Log in to your core account on Hapana
-
Click your name at the top left of the screen and select Team Settings from the dropdown
-
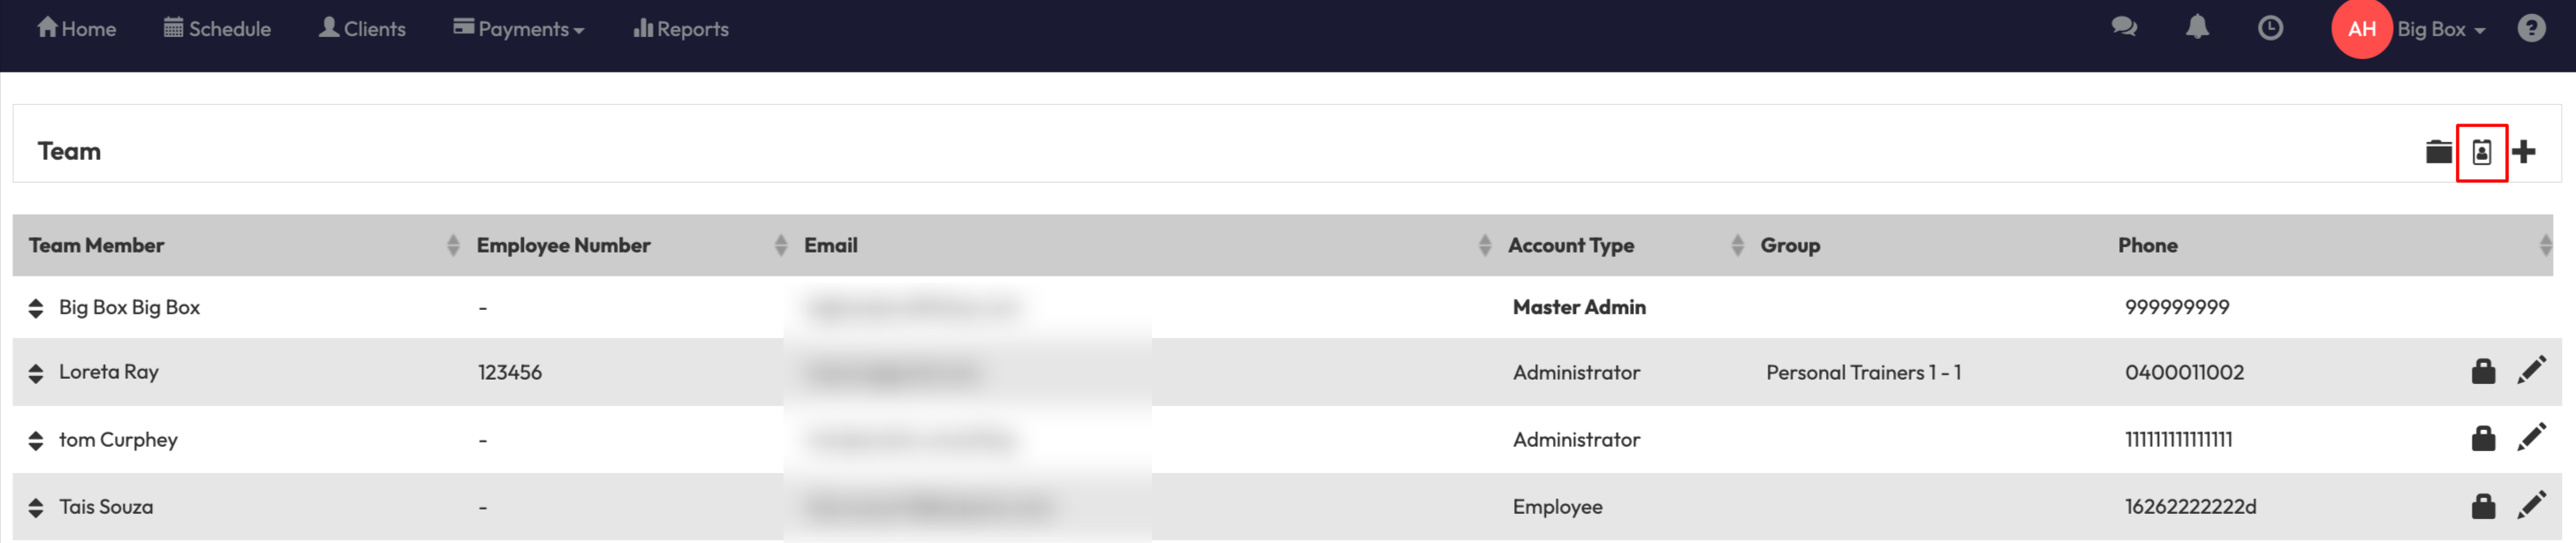
Select the Team Access Group icon at the top of the screen
-
Click Create a New Group and select Account Type as Administrator OR select Edit on the Team Access Group you wish to give access to the tool (this must be Administrator Account Type)
-
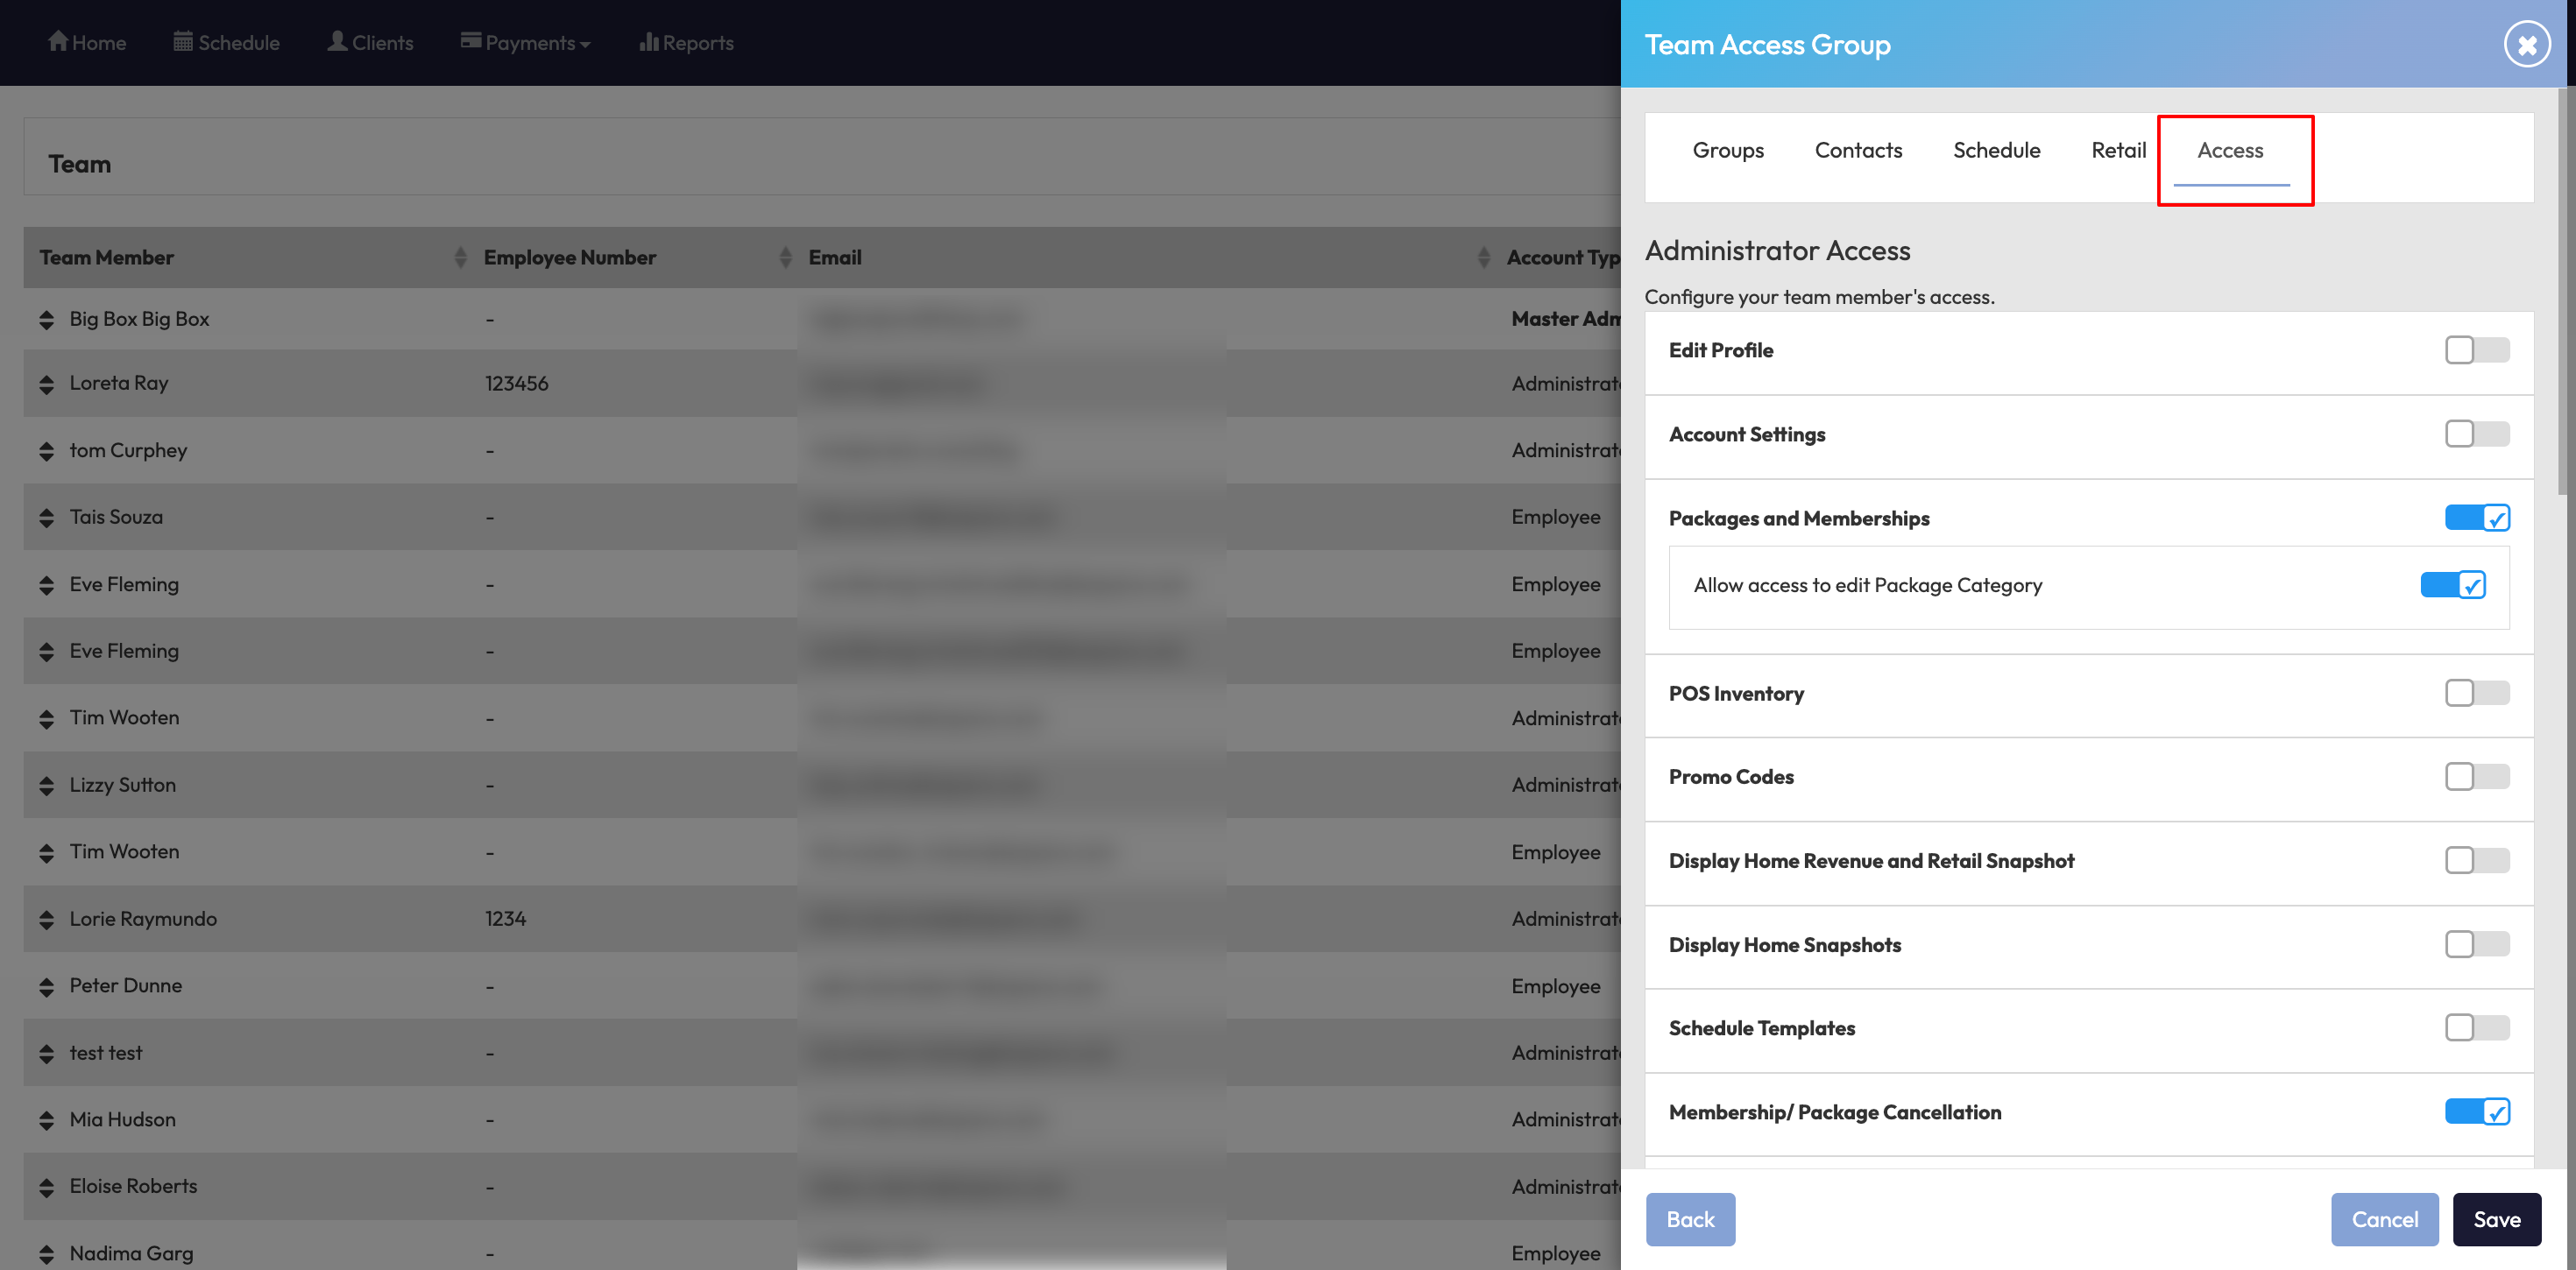
Click into the Access tab (this tab only appears when Account Type is set as Administrator)
-
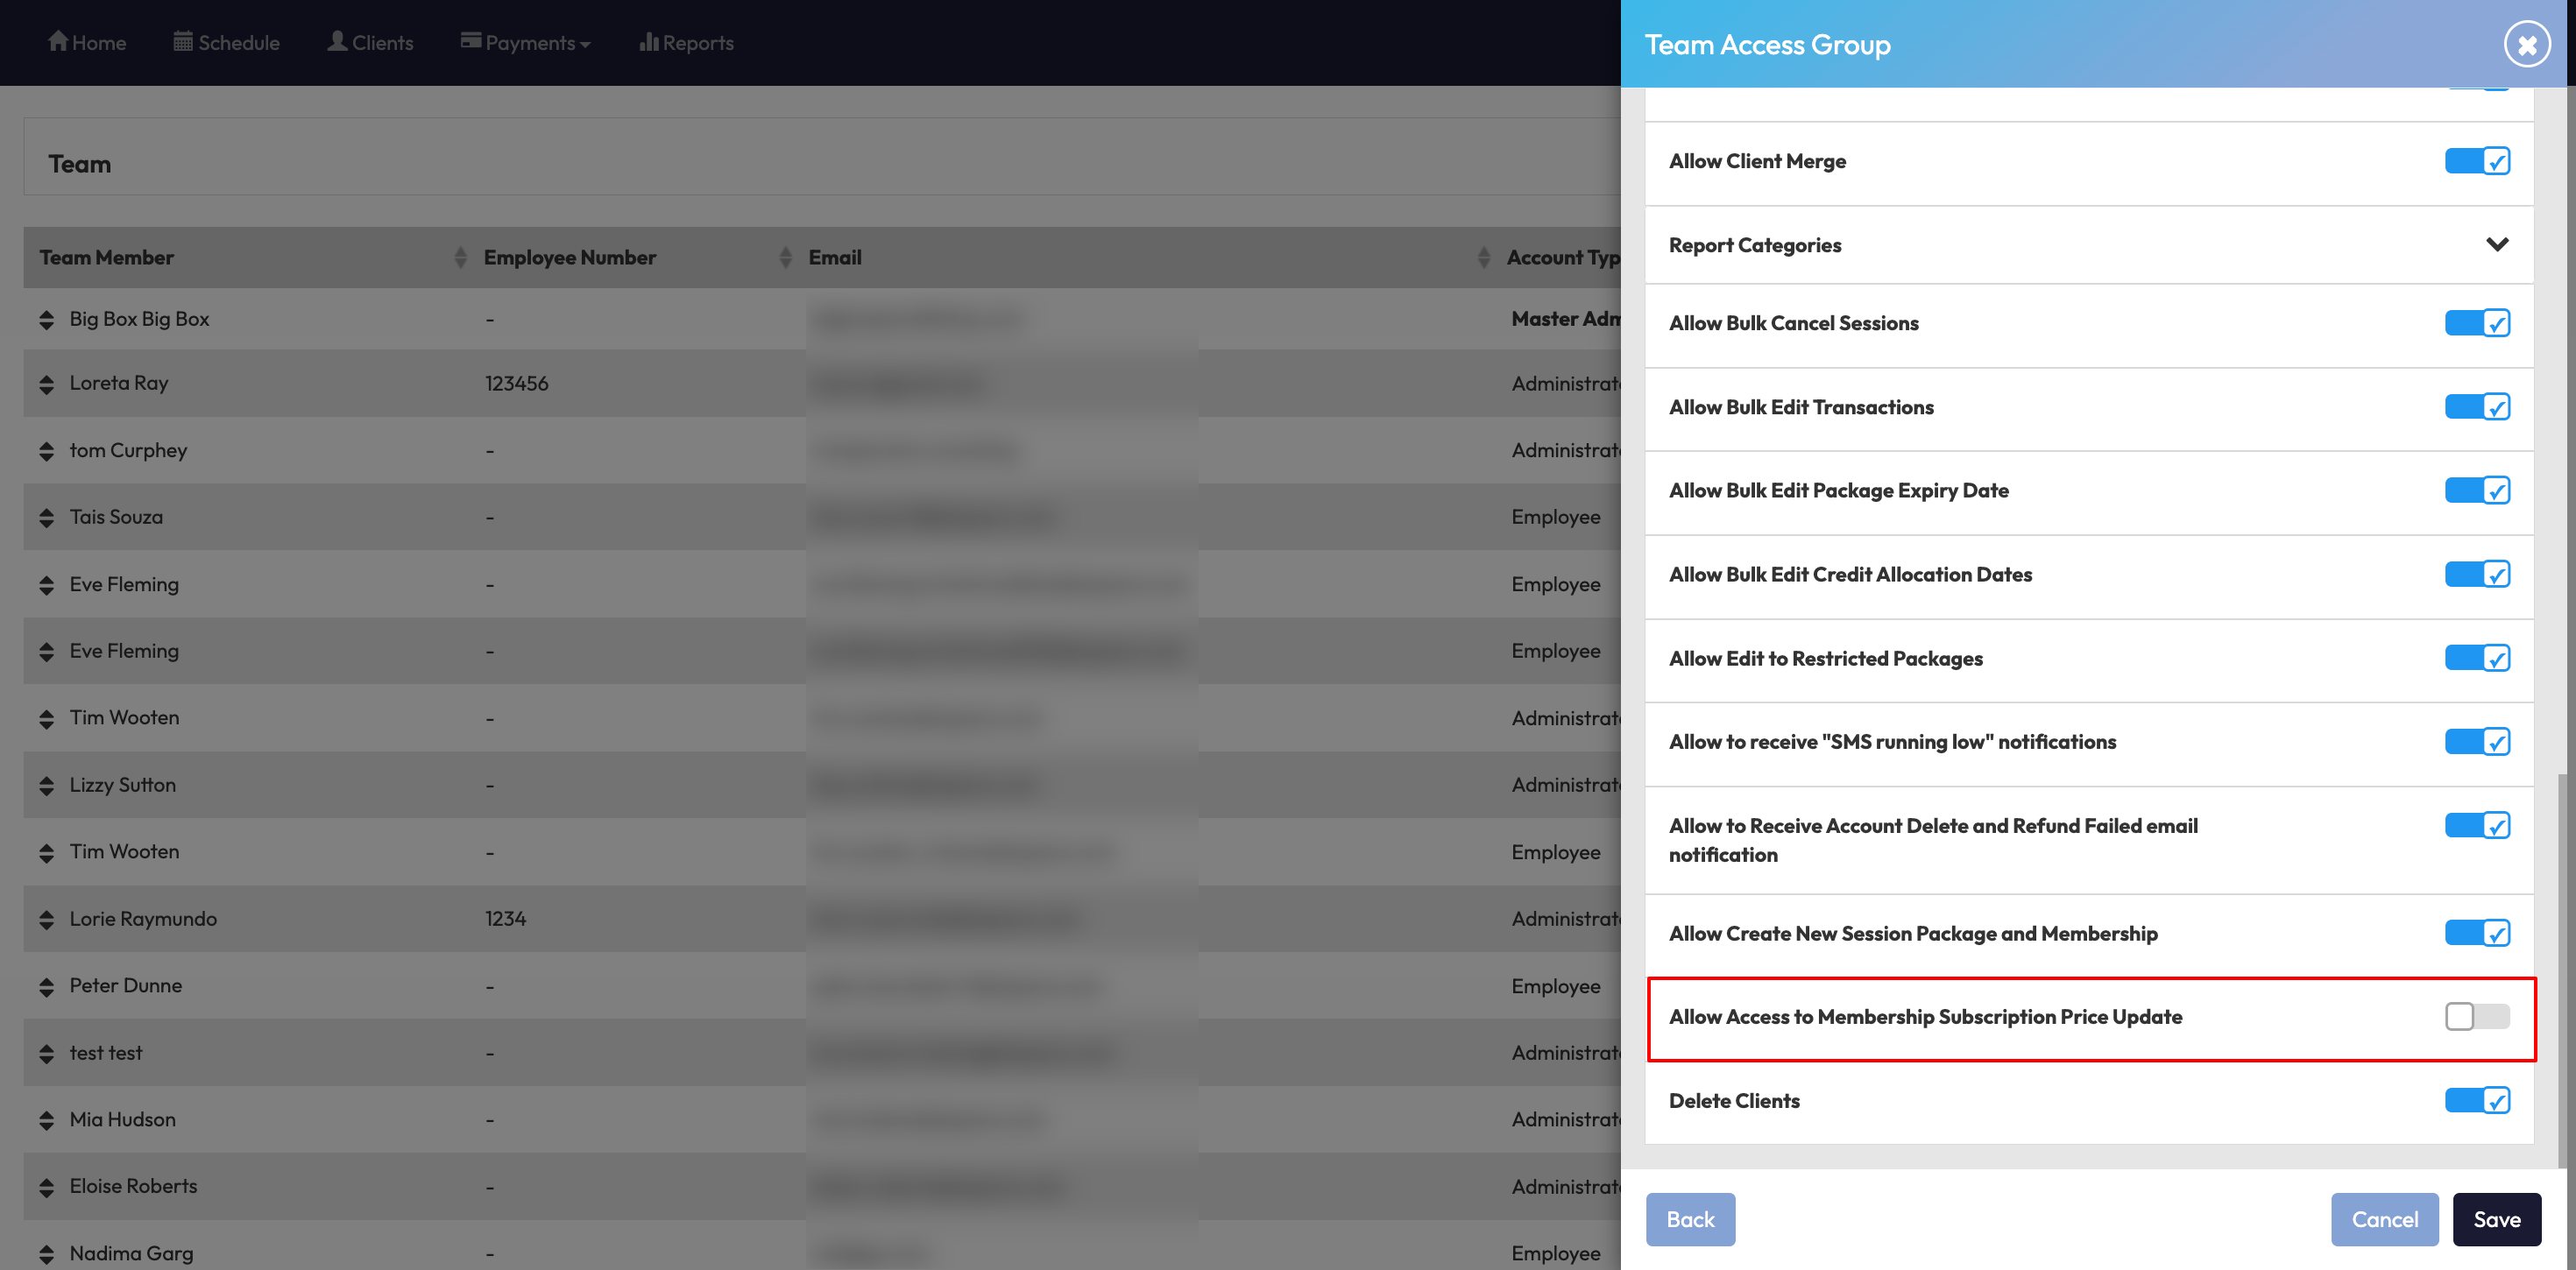
Switch on the Allow Access to Membership Subscription Price Update toggle
Step 2: Open the Membership Subscription Price Update
-
Open Retail Configurations > click Payments in the main menu
-
Select Retail Configurations
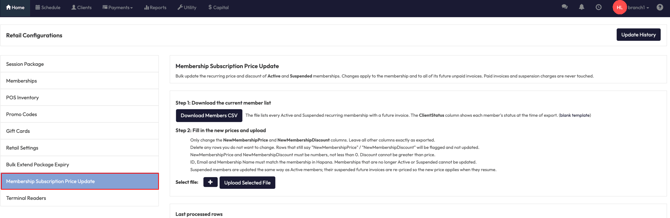
- Select Membership Subscription Price Update
Step 3: Download the template
- On the page that opens, click the Download Members CSV button to download a template of your members' existing memberships.
Step 4: Open and review the template
- Open the downloaded template in Excel or your preferred spreadsheet tool.
- Review the list of your members, their memberships, current prices, and any existing discounts.
Step 5: Fill in the new prices and discounts
- Complete the NewMembershipPrice and NewMembershipDiscount columns for every membership you want to update.
- Enter the new price, and enter the discount amount or 0 if there's no discount.
- Delete any rows for memberships you don't want to change. The file should only contain the memberships you're updating.
Tip: Enter numbers only in the price and discount columns: no dollar signs, no text. See "How to Prevent Import Errors" below for the full list of things to avoid.
Step 6: Save your file as a CSV
- Save or download your updated file in CSV format.
Step 7: Upload your file
- Back on the Bulk Import page, click the plus (+) icon.
- Click Upload selected files to import your CSV.
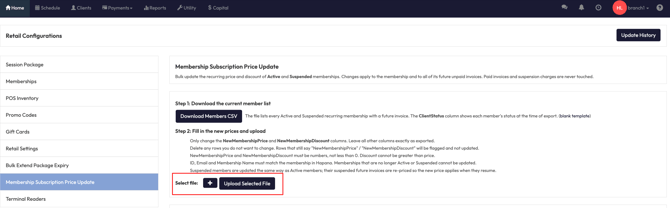
Step 8: Review the summary of changes
- Check the summary carefully. Make sure every price and discount looks correct before moving on.
Step 9: Import the data
- When everything looks good, click Import Data in system and then click Confirm.
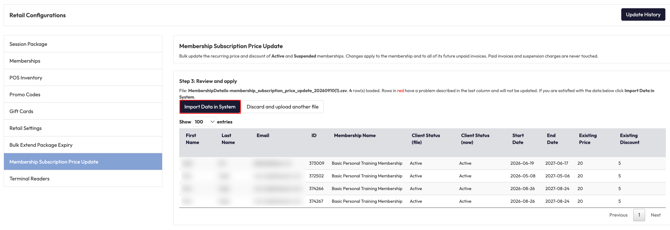
Step 10: Wait for confirmation
- Watch the progress bar and wait for the success confirmation to appear. This tells you all your updates have been applied.
How to Prevent Import Errors
A few small things in your CSV can cause the import to fail. Before uploading, check that:
- Names don't contain apostrophes: names like O'Brien usually throw errors, so remove the apostrophe in the file.
- The price columns (columns H and J) contain numbers only: words or text in these columns will throw errors.
- There are no $ signs anywhere in the file. For example enter 45.95, not $45.95.
- There's no data outside the expected columns: stray notes or values in extra columns will cause errors.
- The columns stay in their original positions: don't rearrange, add, or remove columns from the template.
Tip: If your import fails, these five things are the first places to look. Fix the file, re-save it as a CSV, and upload again.
Expected Outcome
Once you've finished, your membership prices are updated in Hapana. Single-membership edits take effect as soon as you save, and bulk updates apply to every client in your file after the success confirmation appears. Your clients' billing will reflect the new prices and discounts going forward.
FAQ
Q: Do I need to include every member in the bulk update file?
A: No, only the memberships you're changing. Delete the rows for anyone you don't want to update before saving your CSV.
Q: What if I don't want to apply a discount?
A: Enter 0 in the NewMembershipDiscount column. Leaving it blank or typing text can cause the import to fail.