
Overview
The Social Planner in GROW lets you create, schedule, and automate social media posts from one place helping you stay consistent online without daily manual posting.
What is the Social Planner?
Social Planner helps you:
-
Connect and manage social media accounts
-
Create posts using templates or from scratch
-
Schedule posts ahead of time
-
Automate evergreen content with recurring posts
Expected outcome: Less time posting, more consistent engagement, and a stronger online presence.
Set Up Social Planner
Before posting, connect your social account.
-
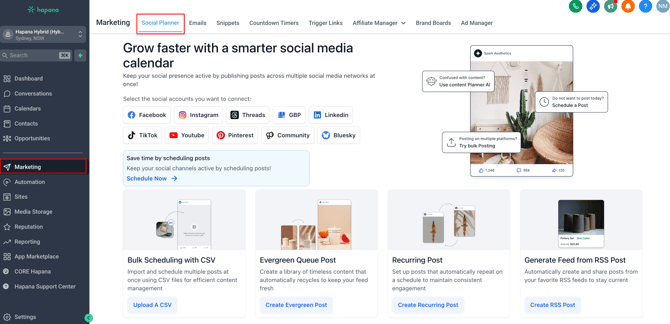
Go to Marketing > Social Planner
-
Select the social accounts you want to connect e.g. Connect Facebook
-
Log into Facebook and select a Page
-
Verify the connection
Important note: Certain integrations can expire depending on the platform. These expirations are controlled by the provider i.e. Meta, Google, TikTok. If they expire, a message will appear at the top during login.

Create a Custom Post
-
Go to Marketing > Social Planner
-
Click New Post > Create New Post
-
Select your social account(s)
-
Add your caption and media
-
Choose to post now, schedule, save, or set as recurring

Create Posts Using Templates
Templates make posting fast and easy.
-
Go to Marketing > Social Planner
-
Click New Post > Social Planner Templates
-
Browse or search templates
-
Preview and click Continue
-
Click Select Socials (plus icon)
-
Choose account, date, and time
-
Click Schedule Posts

How to Use Evergreen Queue Post
Create a library of timeless content that automatically recycles to keep your feed fresh.
-
Go to Marketing > Social Planner
-
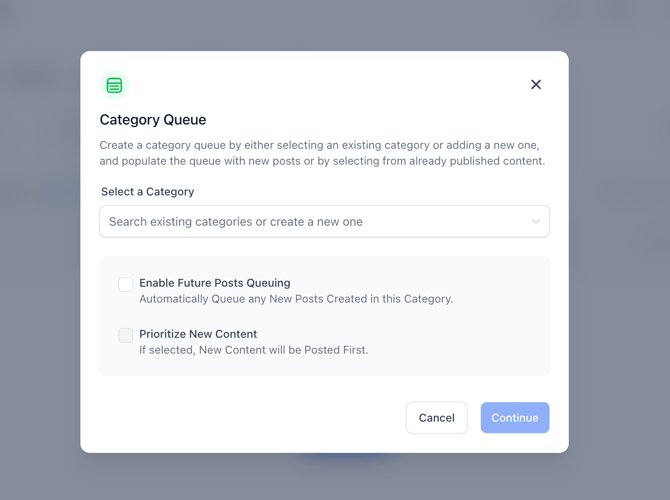
Click Evergreen Queue Post
-
Select a Category from existing categories or create a new one
-
Choose to Enable Future Posts Queuing or Prioritise New Content
How to Create a Recurring Post
-
Go to Marketing > Social Planner
-
Click Create Recurring Post
-
Select social account(s)
-
Create your post
-
Enable Recurring Schedule and choose frequency

Best Practices
-
Review recurring posts regularly
-
Avoid overusing repetitive content
-
Align posts with active campaigns
-
Be mindful of time zones and platform rules
-
Refresh captions to keep posts feeling human
Need Help?
For questions or assistance, contact support@hapana.com.